Our Managed DMARC feature simplifies DMARC management by providing a dynamic DMARC CNAME record to publish in your DNS zone. This enables you to control and update your DMARC record directly from our dashboard, eliminating the need for manual DNS updates.
1. Once you add your domain, our system automatically generates a dynamic DMARC CNAME record.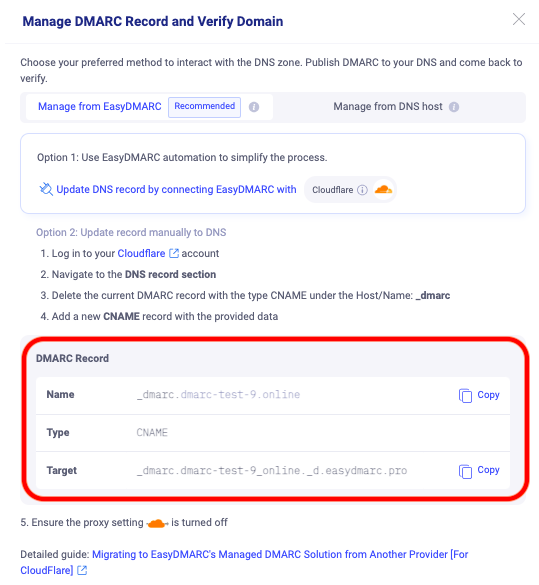
2 .Navigate to your DNS settings and locate the option to add a new DNS record.
Important: Before publishing the CNAME DMARC record, ensure you delete any existing DMARC records. Each domain can have only one DMARC record.
- Choose "CNAME Record" as the record type.
- In the “Host/Name” field, enter "_dmarc" (without the quotes). This specifies that the CNAME record is for DMARC.
- In the “Value/Content” filed, you will define your DMARC record. Copy the value obtained from your EasyDMARC portal and paste it there.
- After defining your DMARC Record, save the CNAME record, and note that DNS changes may take some time to propagate across the internet. Be patient and allow some time for the DMARC record to propagate.

3. After saving and successfully adding the record, return to your EasyDMARC portal and click on “Verify”.

4. After successful verification and propagation, the upper-right corner of your Managed DMARC page will indicate that it is fully Active.
