1. To get Started with SCIM Provisioning, head into you SSO configuration page within EasyDMARC.
https://account-console.easydmarc.com/sso/service-provider-details
Here you will be able to see and copy the Tenant URL and Secret Token for SCIM.
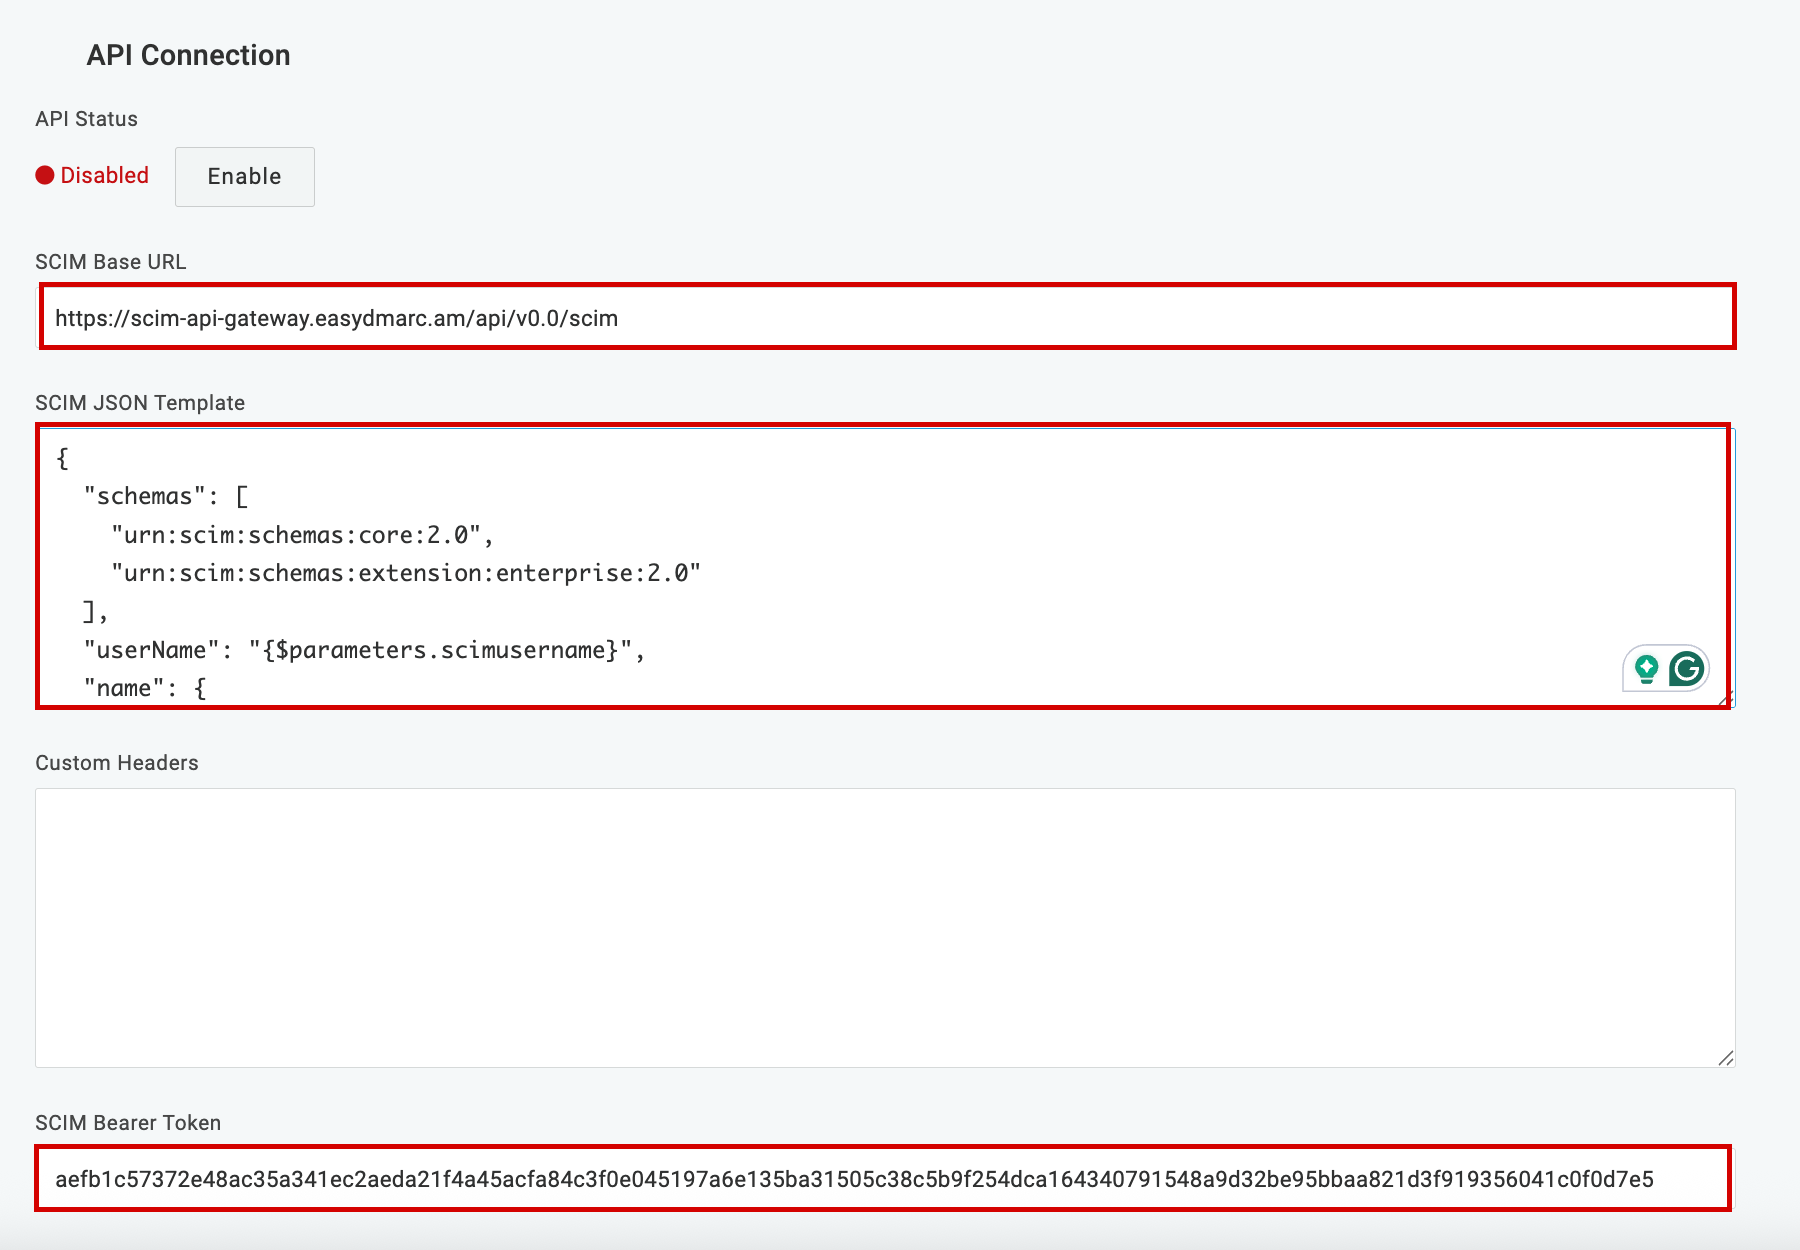
2. Navigate to your OneLogin SAML app for EasyDMARC and head into the Configuration tab and Enable API Connection.
3. Afterwords, you'll need to enter the following properties.
SCIM Base URL: Tenant URL Values from EasyDMARC
SCIM Bearer Token: Secret Token Values from EasyDMARC
SCIM JSON Template:
SCIM JSON Template:
{ "schemas": [ "urn:scim:schemas:core:2.0", "urn:scim:schemas:extension:enterprise:2.0" ], "userName": "{$parameters.scimusername}", "name": { "familyName": "{$user.lastname}", "givenName": "{$user.firstname}", "formatted": "{$user.display_name}" }, "emails": [{ "value": "{$user.email}", "type": "work", "primary": true }], "title": "{$parameters.title}", "urn:scim:schemas:extension:enterprise:2.0": { "department": "{$parameters.department}", "manager": { "value": "{$parameters.external_manager_id}", "displayName": "{$user.manager_firstname} {$user.manager_lastname}" } }}It should match the screenshot below.
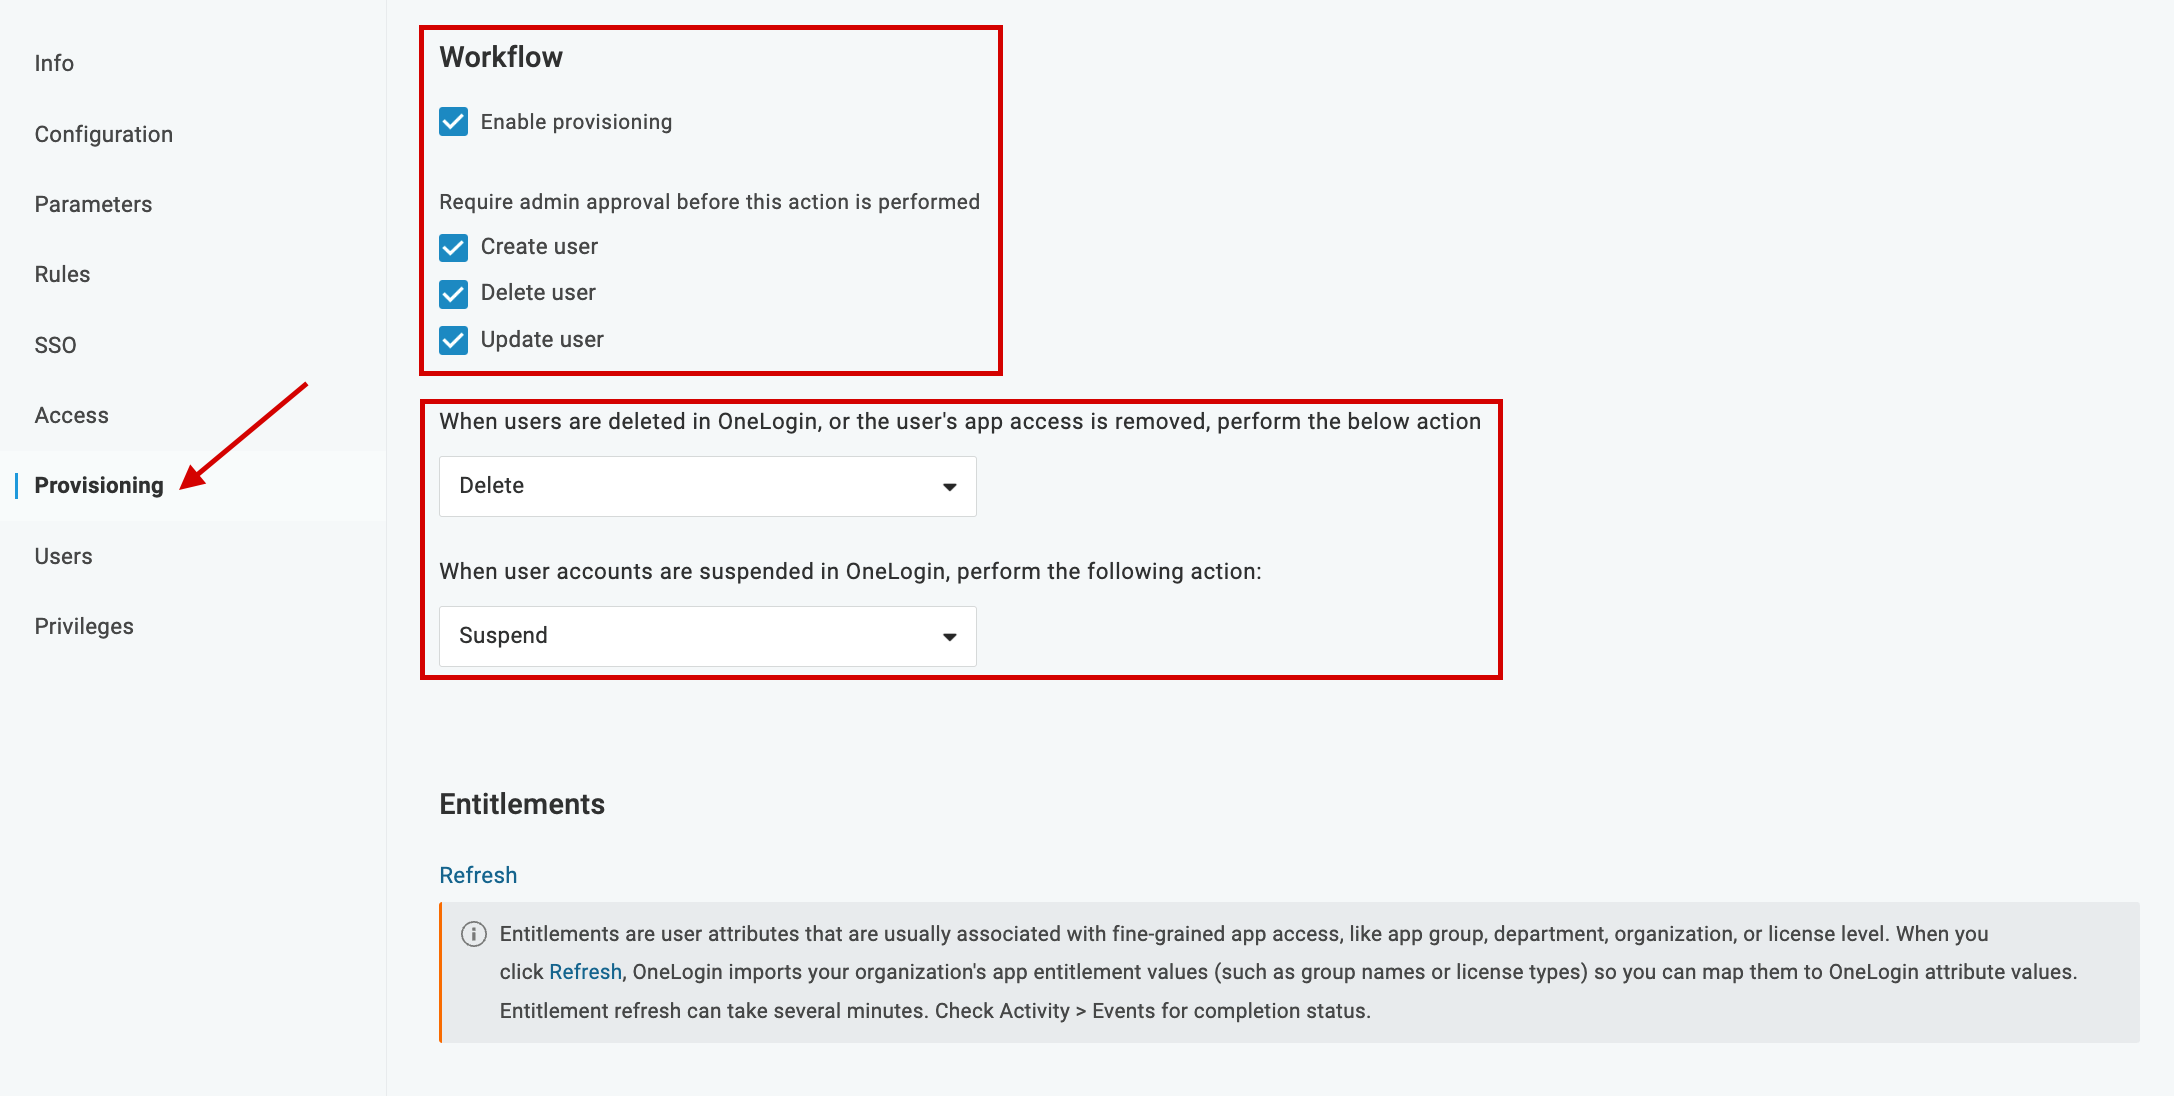
4. Next head into the Provisioning tab, enable it, and match all values with the screenshot below.
5. Next head into the Parameters tab and match all values with the screenshot below.
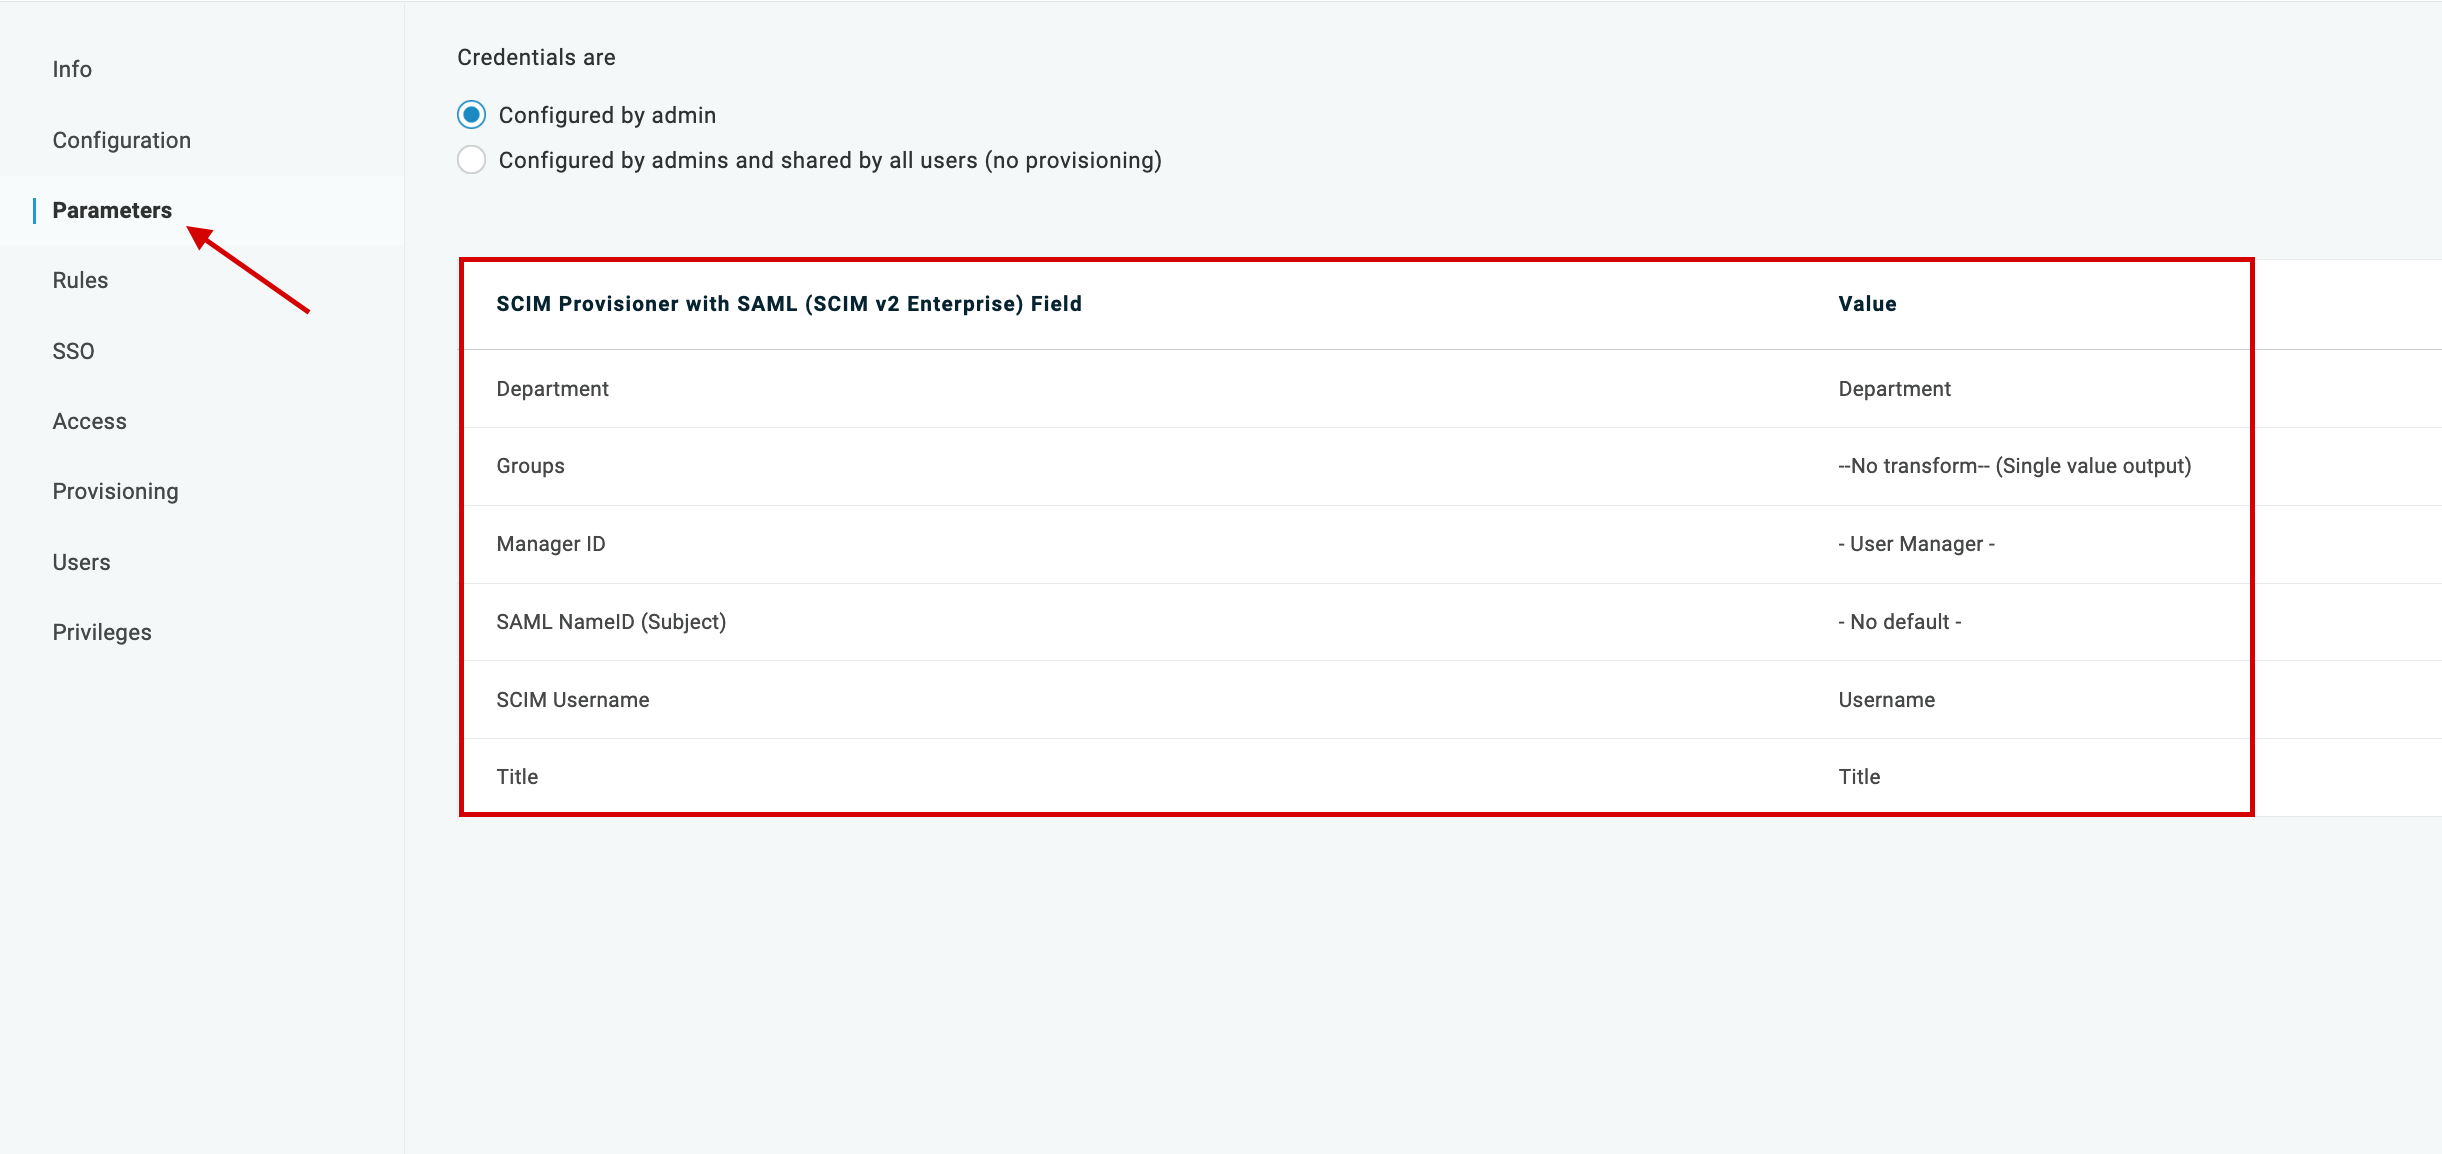
Now you can use SCIM Provisioning with your EasyDMARC SAML App.