If TouchPoint is included in your plan, you can locate it by clicking the EasyDMARC’s product dropdown in the upper left part of the page and selecting Touchpoint:
There are two ways to add leads to the dashboard:
1. Create a Widget
Click the “Create Widget” button in the “Leads” page:
Enter the description of your widget and the website URL where the widget is going to be hosted, then click the “Create” button:
You will automatically be redirected to the “Widgets” section of TouchPoint. Here, you will be provided with the options to adjust the widget settings based on your preferences.
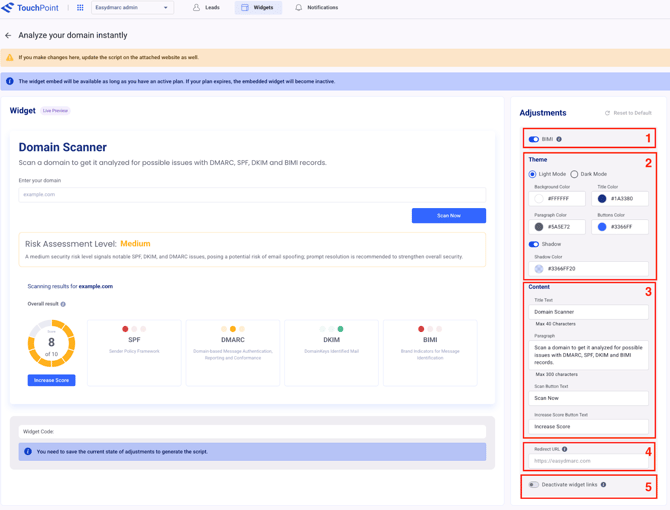
Adjustment options include:
1. Toggle for BIMI: Turn on when you want your scanner widget to also show BIMI information.
2. Theme: Dark or Light Mode, Colors of the background, title, buttons, and paragraph, as well as the option of enabling shadow and selecting the shadow color.
3. Content adjustment options that include the Title text, Paragraph text, Scan button text, and the Increase score button text
5. Option to deactivate the widget links: Enabling this option will remove the redirection links to EasyDMARC’s tools for DMARC, SPF, DKIM, and BIMI widgets in the scan results.
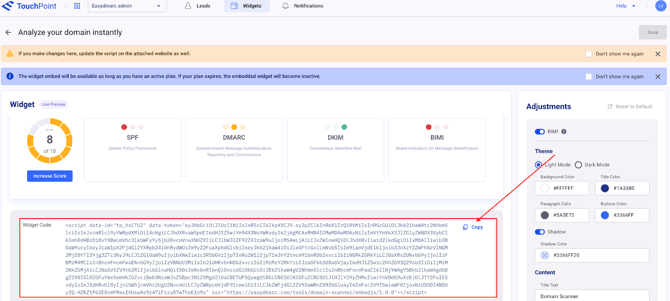
Once you complete the adjustments, click the “Save” button, and you will be provided with the Widget code that you can copy to use for hosting the widget on your website:
When a prospect scans their domain, TouchPoint analyzes its configuration and classifies the company into segments such as High-Risk or Non-Compliant. This process converts anonymous website visitors into qualified inbound leads ready for sales.
To manually add the leads, click the “Add leads” button in the “Leads” section, after which the system will provide you with two options: enter the company domains one by one or upload a CSV/XLSX file with the domain list:
Once you add the domain/CSV file, click the “Add” button:
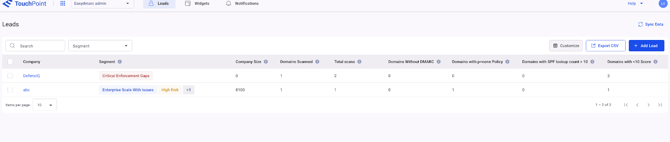
Once the leads(domains) are added, Touchpoint enriches each domain and attaches company-level context that includes:
- Company info: Company size, Country, City, Industry.
- Decision makers: A list of relevant IT contacts.
- Segments: System-defined segments applied automatically (e.g., High-Risk, Non-Compliant, etc.).
- Domain-specific data & metrics: How many domains have been scanned from that company, Total scans (includes duplicates), the number of domains without DMARC / with DMARC policy set to “p=none” / with Domain score less than 10 / with SPF lookup count exceeding 10
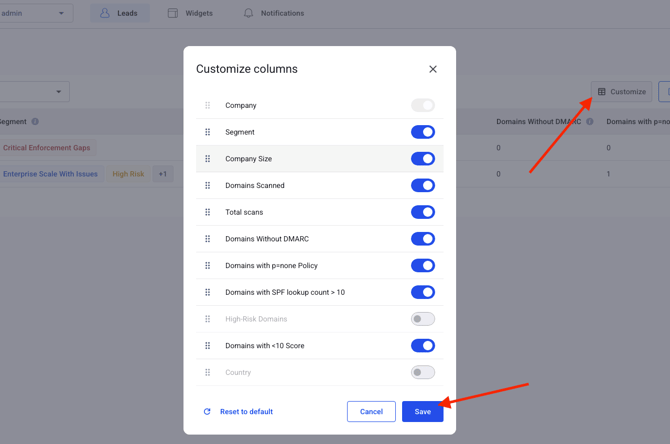
You can adjust the above-mentioned information using the column customization button in case you need to exclude some details from the dashboard or include some additional information.
Additionally, you can export the leads' information from the dashboard in CSV format(e.g., if you need it for a campaign or to provide it to a sales representative):
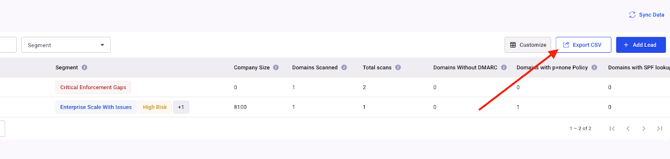
Simplify your work with the leads, filtering them by segments:
Apply one or multiple segments to narrow the list (e.g., High-Risk + SMB).
Explore a Lead by navigating to the Company Profile Page
When clicking on the company name, you will be redirected to the company profile page:
The company profile page includes 4 sections:
1. General: an overview of key company details and scan metrics. It includes the Company name, Employee count, and Source, indicating how the lead was added (via widget, manual scan, or bulk upload). It also shows the Total scans performed by users from this company (including duplicates) and highlights High-risk domains where the DMARC policy is set to “none.” Additional fields display the company’s Industry, Website, and Location, along with the count of Unique domains scanned (each domain counted once). Finally, the Segments field lists system-assigned tags, as a lead may belong to multiple segments.

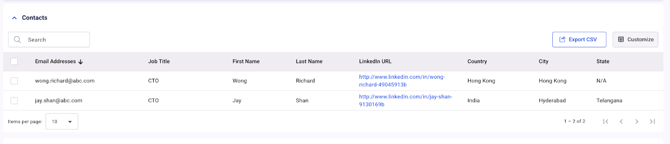
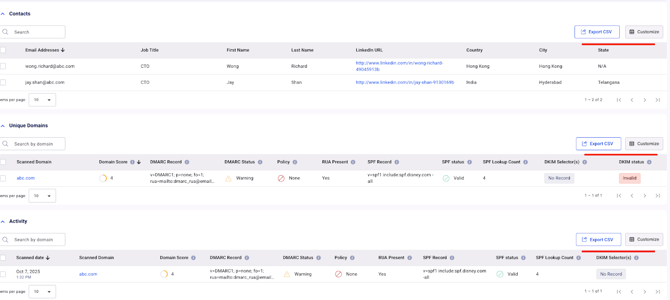
2. Contacts: provides a contact list found for the selected company, including the email address, Job title, First and Last names, LinkedIn URL, Country, City, and State
3. Unique domains: displays detailed information for each scanned domain. It includes the scanned domain name and its Domain Score, which reflects the overall email authentication health across SPF, DKIM, and DMARC (a higher score indicates better configuration). The section also shows the DMARC Status (valid or invalid), DMARC Record (published DNS value), and DMARC Policy (none, quarantine, or reject). Additionally, it specifies whether RUA reporting is configured, lists the SPF Record and its SPF Status (valid or invalid), along with the SPF Lookup Count. Finally, it provides the DKIM Selectors found in DNS and their corresponding DKIM Status.

4. Activity: displays all scan activities associated with the company, including details on who performed each scan and when it occurred. Duplicate scans are also included in this count.

The Contact, Unique Domains, and the Activity sections in the company profile page have the option to customize the columns, as well as the export option:
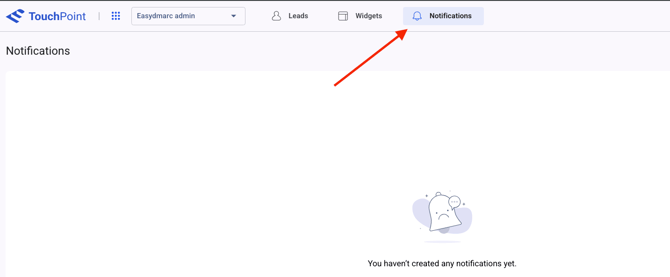
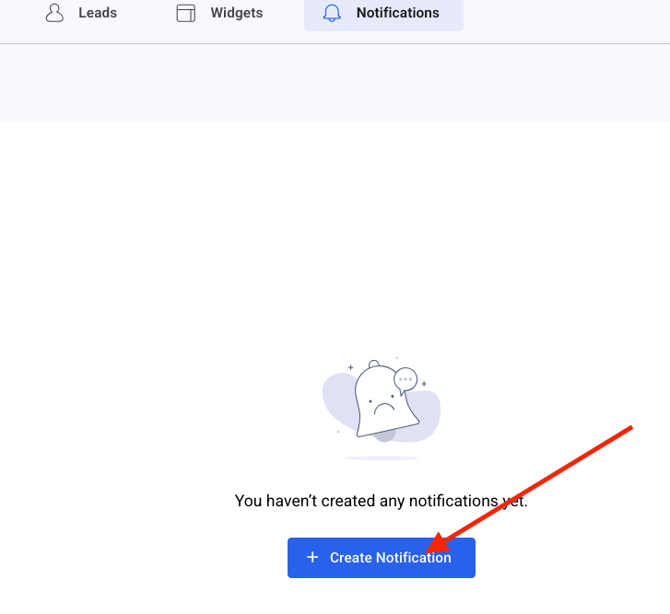
Notifications
With TouchPoint, you also have the “Notifications” section that you can locate by clicking the “Notifications” button on the upper part of the page:
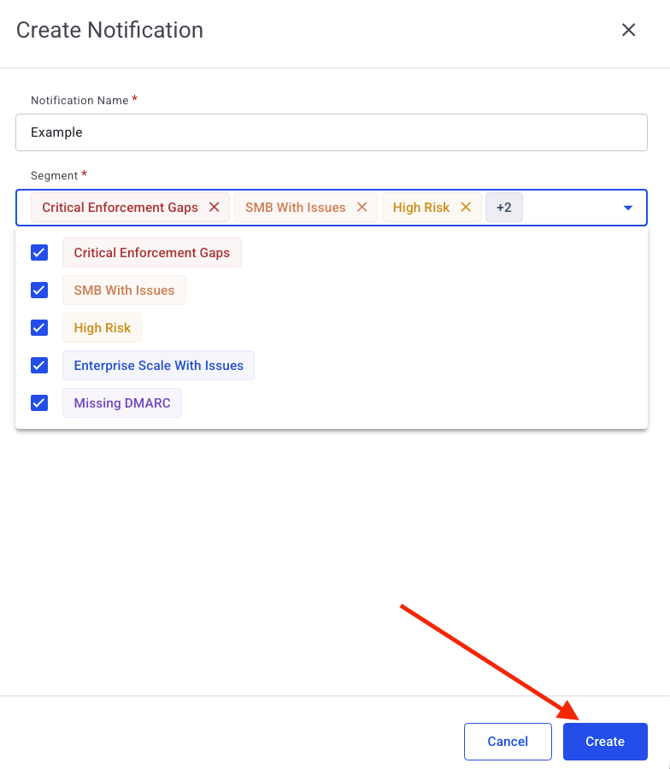
You can set up notifications to track any segment that you prefer by clicking the “Create notification” button.
Type in the notification name, choose the segment you want to track (you can choose multiple segments at once), and add the recipient email address (you can add up to 20 recipients per notification).
Once done, click the “Create” button.
Quick Tips
- Use Widgets for inbound: Enable self-serve scans to capture instant qualified leads.
- Use Add Leads / Upload for outbound: Enrich prospect lists at scale and keep data fresh.
- Start your day with a Segment filter: Focus on high-value targets (e.g., High-Risk + Enterprise) to prioritize outreach.
- Use Export CSV: Perfect for running campaigns or handing off data to sales ops.