
Shopify is an e-commerce platform that lets businesses build and run online stores, with a built-in email marketing tool for sending campaigns and automations tied directly to store data and customer purchase history.
To integrate Shopify with EasyDMARC, please check the steps below:
1. Initiate the Connection:
Log in to your EasyDMARC account and navigate to Integrations. Locate the Shopify tile and click Connect Account.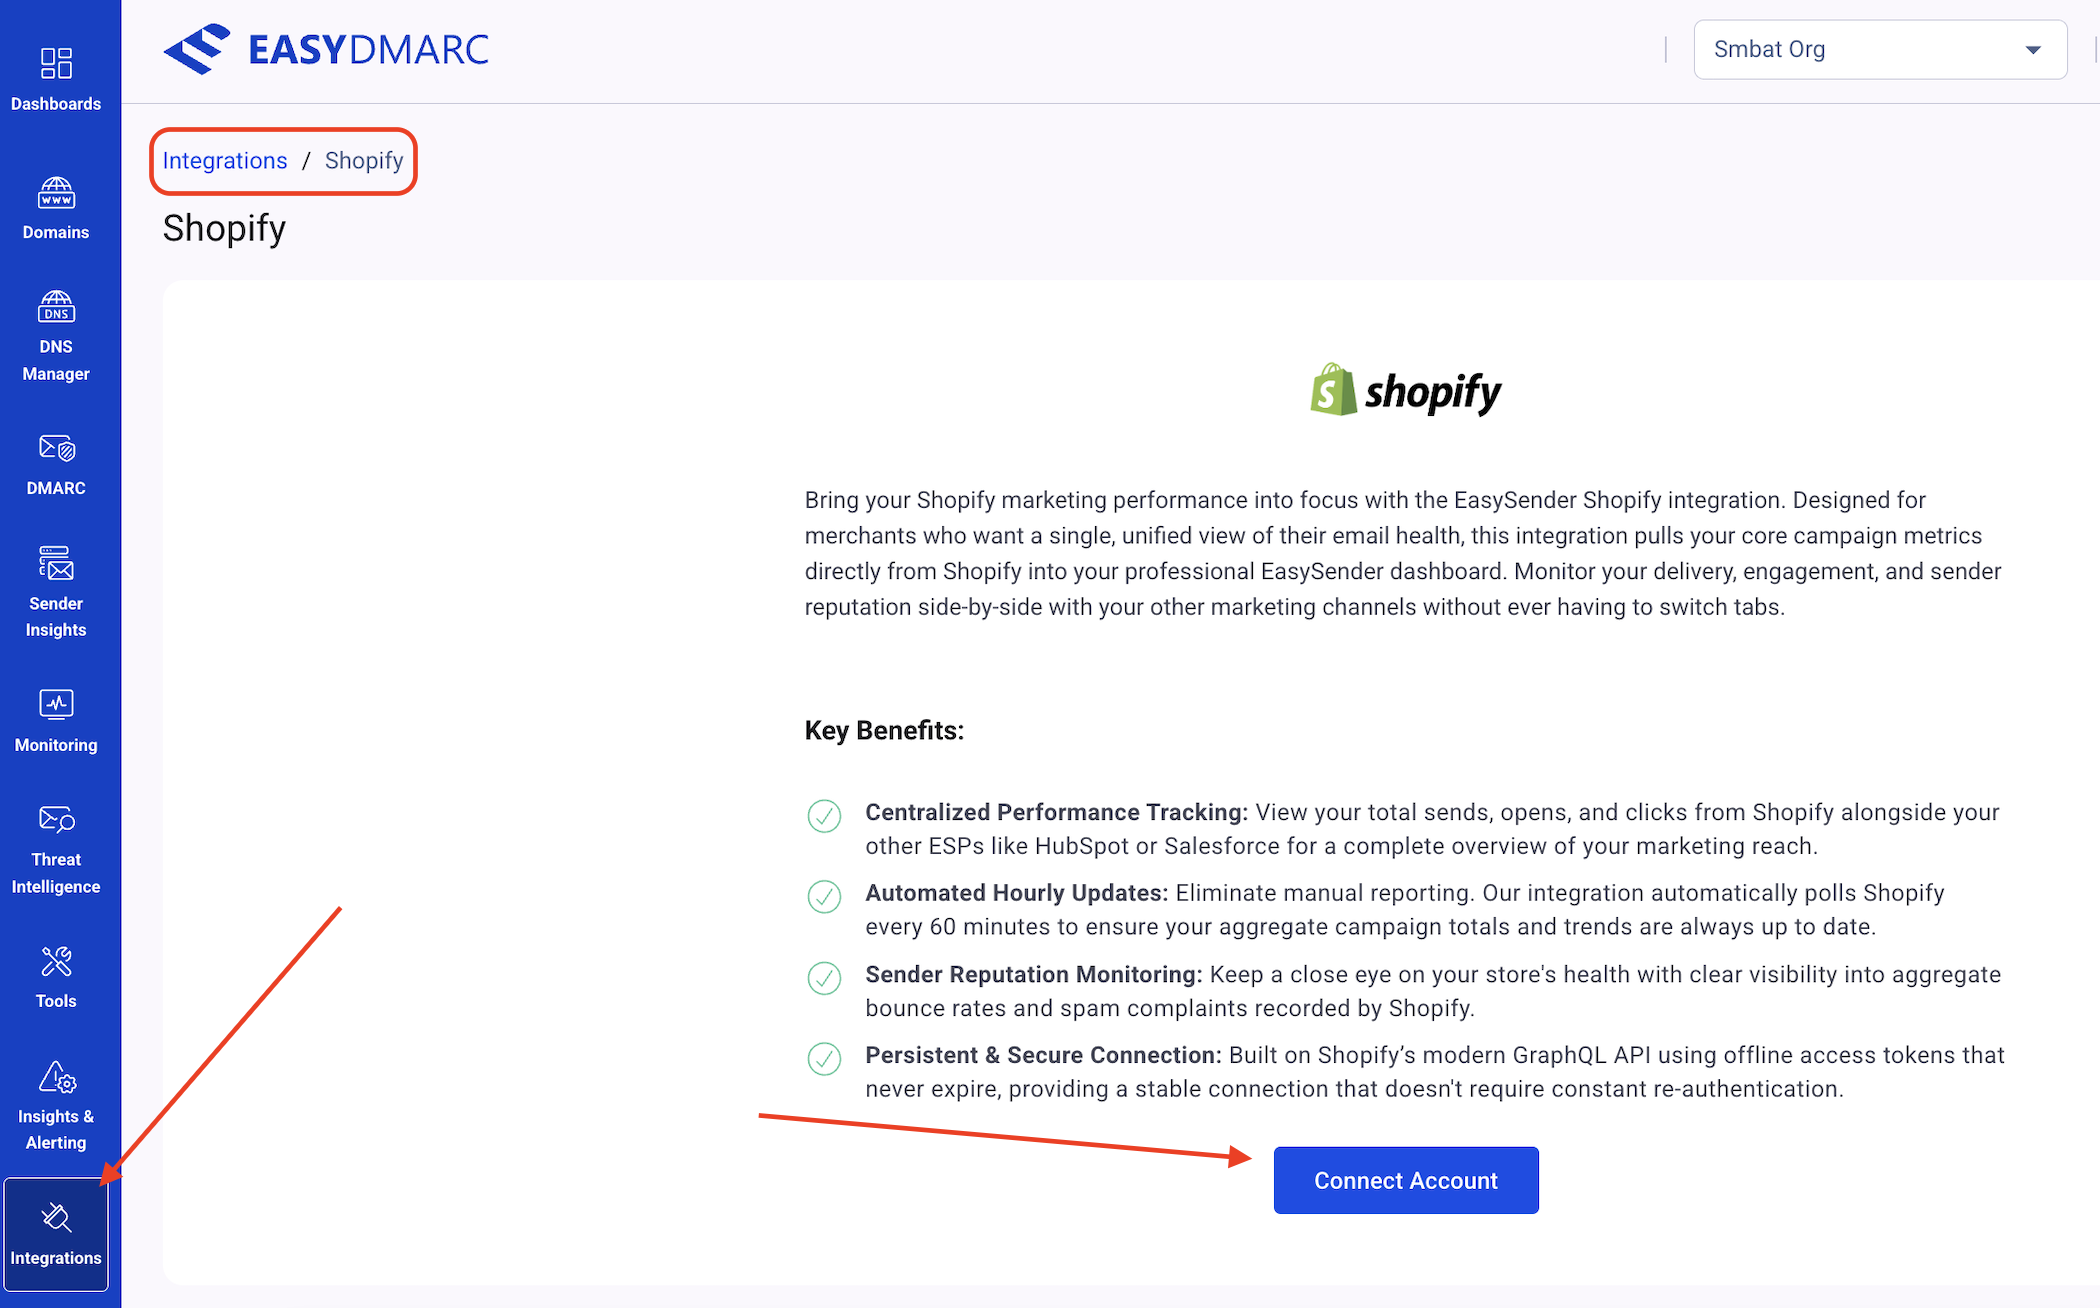
2. Enter Store Details:
You will be prompted to enter your Shopify store URL. Use your original .myshopify.com address (e.g., your-store-name.myshopify.com) rather than your public custom domain to ensure a successful API connection.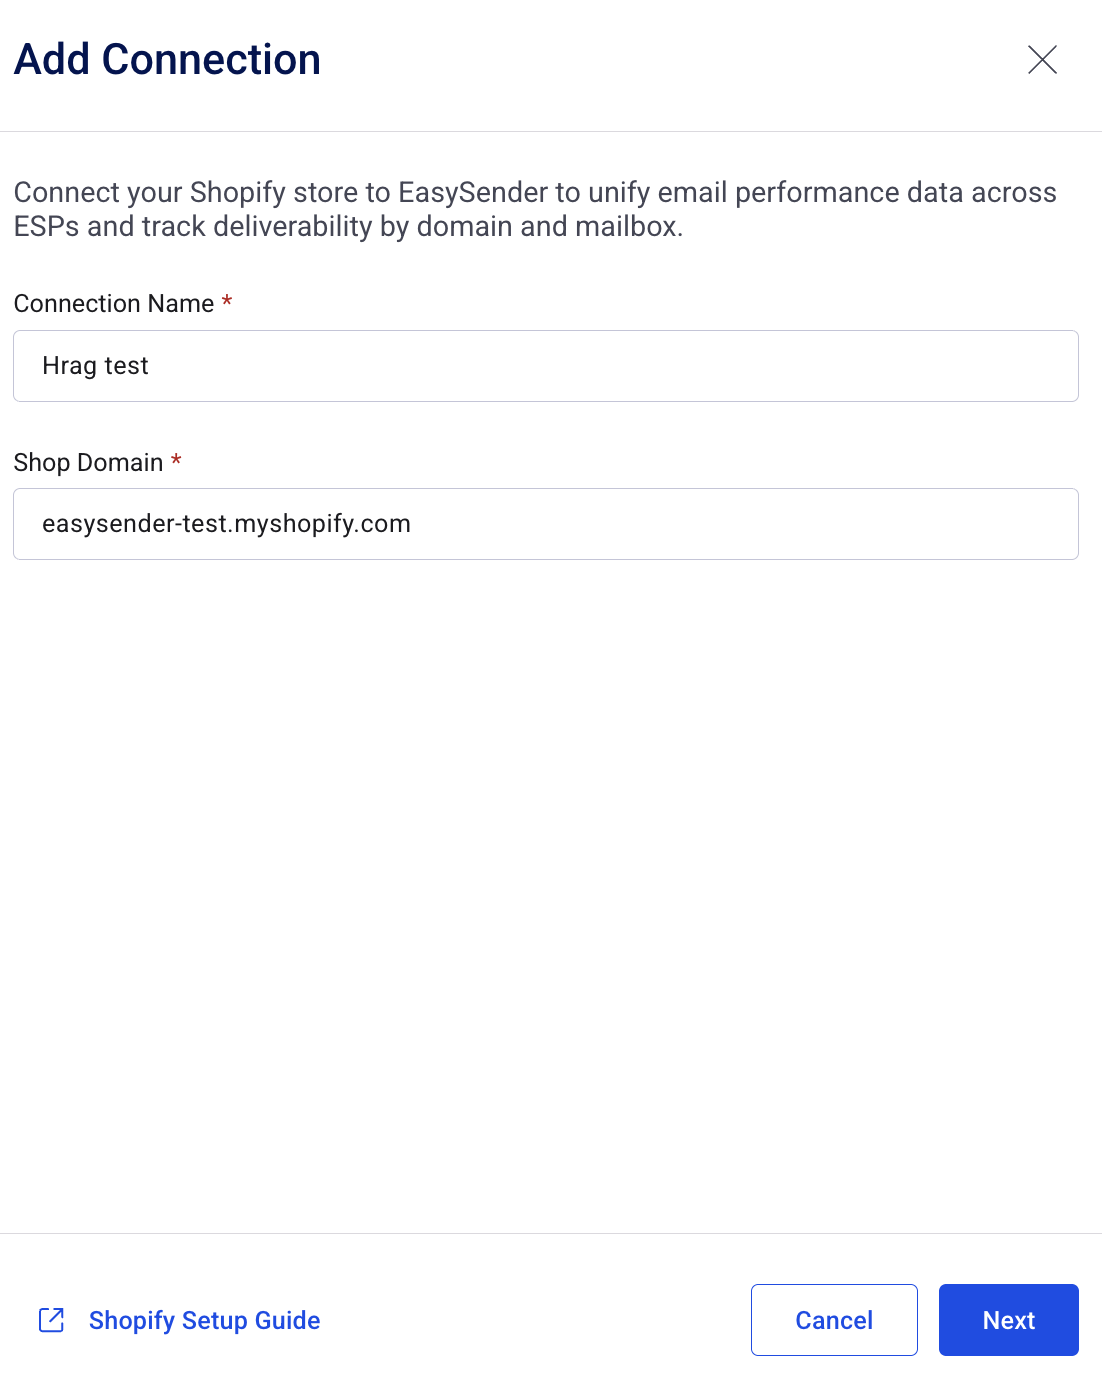
3. Authorize Access:
You will be redirected to your Shopify Admin to approve the integration. EasyDMARC requires the read_marketing_events permission to pull your campaign metrics into your dashboard. Click Install to confirm.
4. Confirm Primary Sender:
EasyDMARC will automatically detect the primary sender identity configured in your store. Note that Shopify supports only one sender identity per store.
5. Initial Data Sync:
Once connected, EasyDMARC will begin polling the Shopify API. Your dashboard will begin displaying performance data within 60 minutes. Moving forward, metrics will refresh every hour as Shopify updates its daily campaign aggregates
If there are still questions or concerns that remain uncovered after checking this article, you can contact EasyDMARC Technical Support.