How to interpret EasySPF data:
First, let’s take a look at this domain which contains an SPF TXT Record like this:
v=spf1 include:spf.protection.outlook.com include:spf.zohomail.com include:mail.zendesk.com include:servers.mcsv.net include:spf.mandrillapp.com
For this specific example, the EasySPF portal will provide this information:
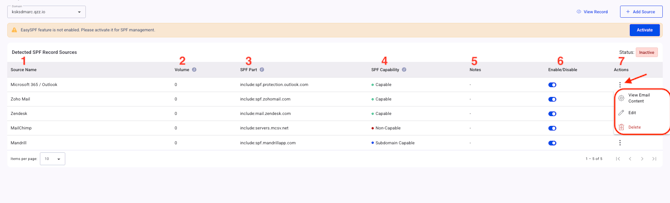
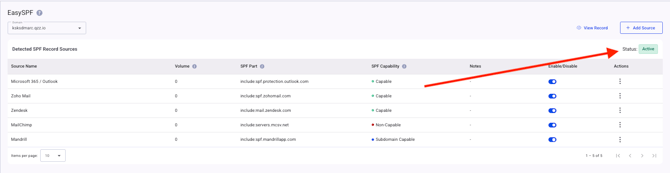
- Source Name: This is the name of your Email Service Provider. Our system identifies more than 1,400 Email Sources to provide relevant information about their system’s SPF and DKIM configuration steps.
- Volume: This is the number of outgoing email volumes from a specific source, observed from your DMARC Aggregate Reports.
- SPF Part: This contains the include: mechanism with the given Source. For example:
> Google uses include:_spf.google.com
> Zendesk uses include:mail.zendesk.com
> and so on… - SPF Capability: This tab represents how ESPs handle the SPF domain. It is important to understand that SPF checks against a specific MailFrom or Return-Path address (which is best referred to as SPF Domain) and it differs with multiple providers.
- Notes: Add a note for the sending source based on your preferences or requirements.
- Enable/Disable: Disable a sending source if you no longer want to use it while keeping its SPF entry (include mechanism) in your EasySPF dashboard.
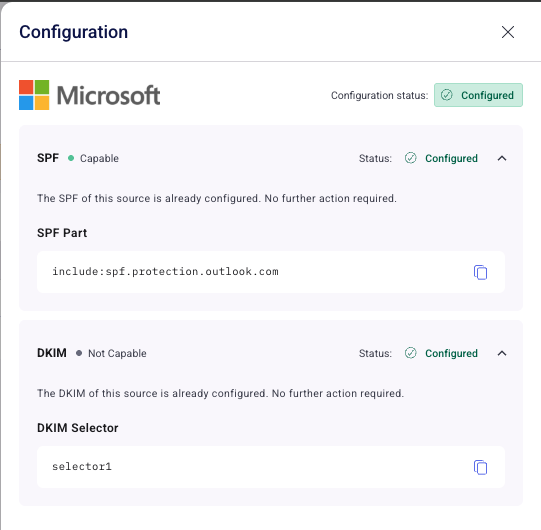
- Actions: Use the available actions to Edit or Delete a sending source. You can also select View Email Content to view the SPF and DKIM configuration status and details for that specific sending source. The information is based on your domain's configuration and data from DMARC aggregate reports.
When it comes to DMARC, you need to have your From: address (which is your own domain), aligned with the SPF Domain (which is the MailFrom or Return-Path domain). If the email source you’re using appends its own domain in the MailFrom or Return-Path domain, you don’t need to whitelist that source in your domain’s SPF record. To read more about Alignment and how ESPs get SPF Wrong, please check this article.
Now, heading back to the actual data, here are the 3 main options we let you see and analyze in your EasySPF Dashboard:
- Capable - This represents that the specific source lets you use your own domain in the Return-Path or MailFrom: section, and you need to have their hostname/domain whitelisted in your SPF record.
- Non-Capable - This represents that the specific source uses their own domain in the Return-Path or MailFrom: section, and you don’t need to have their hostname/domain whitelisted in your SPF Record.
- Subdomain Capable - This represents that the specific source lets you use your subdomain in the Return-Path or MailFrom section, and you need to have their hostname/domain whitelisted in your subdomain’s SPF Record (and NOT in your root domain).
For more information about understanding SPF Alignment and Capability for different ESPs, please read this article. - If the field appears Empty/Blank, it means that we do not have SPF capability information for that specific sending source in our database.
How to implement EasySPF :
1. Now, coming back to the EasySPF dashboard, you can disable the checkmarks for the sources which were marked as “Non-Capable” and “Subdomain Capable”, and then click on "Activate" button.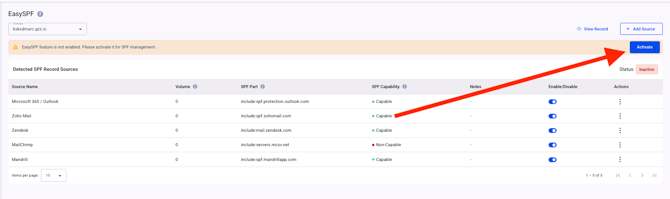
2. You will be provided with a flattened dynamic SPF record that needs to be updated in your DNS.
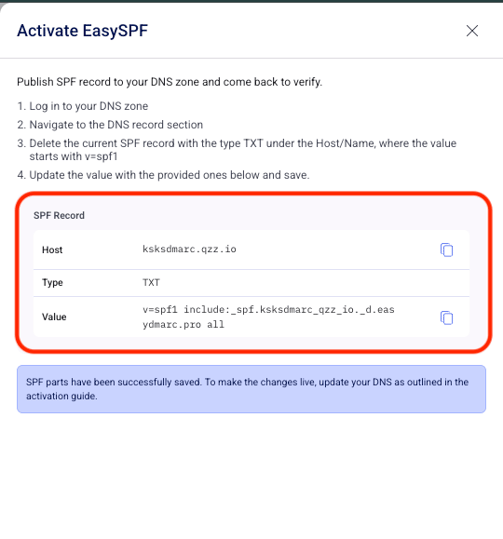
3. Copy the new Record, and replace it with your current SPF Record from your DNS.


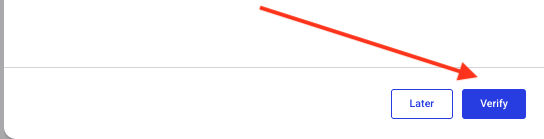
4. After properly updating your SPF record, go back to your EasySPF dashboard and click on “Verify”. (Keep in mind that propagation can take around 3-5 minutes).
5. After proper activation and propagation, you will get to see “ACTIVE” result, which indicates your EasySPF has been properly implemented.
How to manage EasySPF in the long term:
One of the important factors is managing your SPF Record in the long term process, as organizations are dynamic and a new email source may come to life in your organization that needs to be whitelisted.
We’ve simplified these steps for you.
For example, your company decides to use 2 different sources, such as:
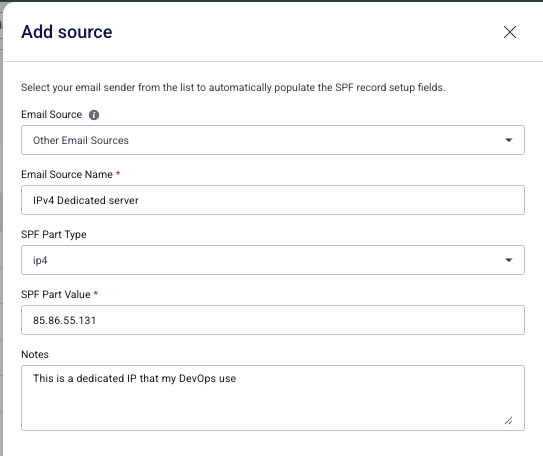
- Dedicated IPv4 address 85.86.55.131
In order to whitelist all these, you need to take the following steps:
- Head to your EasySPF Portal
- Click on “Add Source” button from the upper-right section
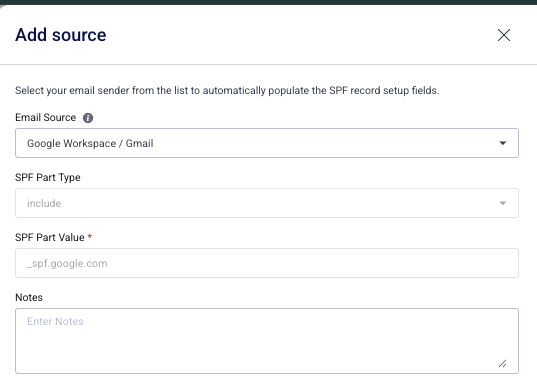
3. For Google, select the appropriate Email Source, set the SPF Part Type to include:, and enter _spf.google.com as the SPF Part Value. You can also add an optional note, then click Add.
-
Important: The "exists" mechanism cannot be added to the EasySPF dashboard. Since EasySPF is a dynamic flattening tool, the "exists" mechanism cannot be flattened, and there is no option to include it directly in the dashboard.
If you need to use the "exists" mechanism, you will need to add it directly to your main SPF record in your DNS zone.
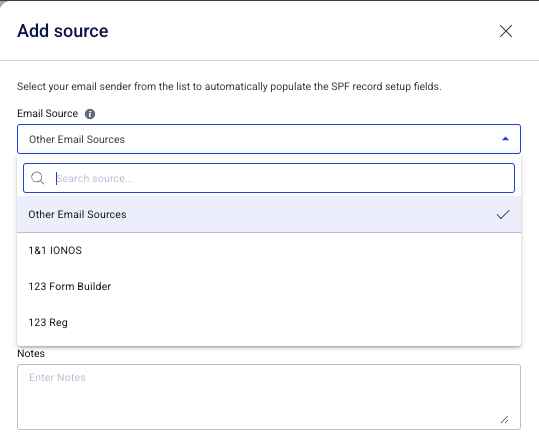
4. For a dedicated IPv4 address, select Other Email Source under Email Source so you can specify the source name according to your preference. Set the SPF Part Type to ip4: and enter 85.86.55.131 as the SPF Part Value. You can also add an optional note, then click Add.
5. After adding the new sources, you should see them automatically updated in your EasySPF portal.

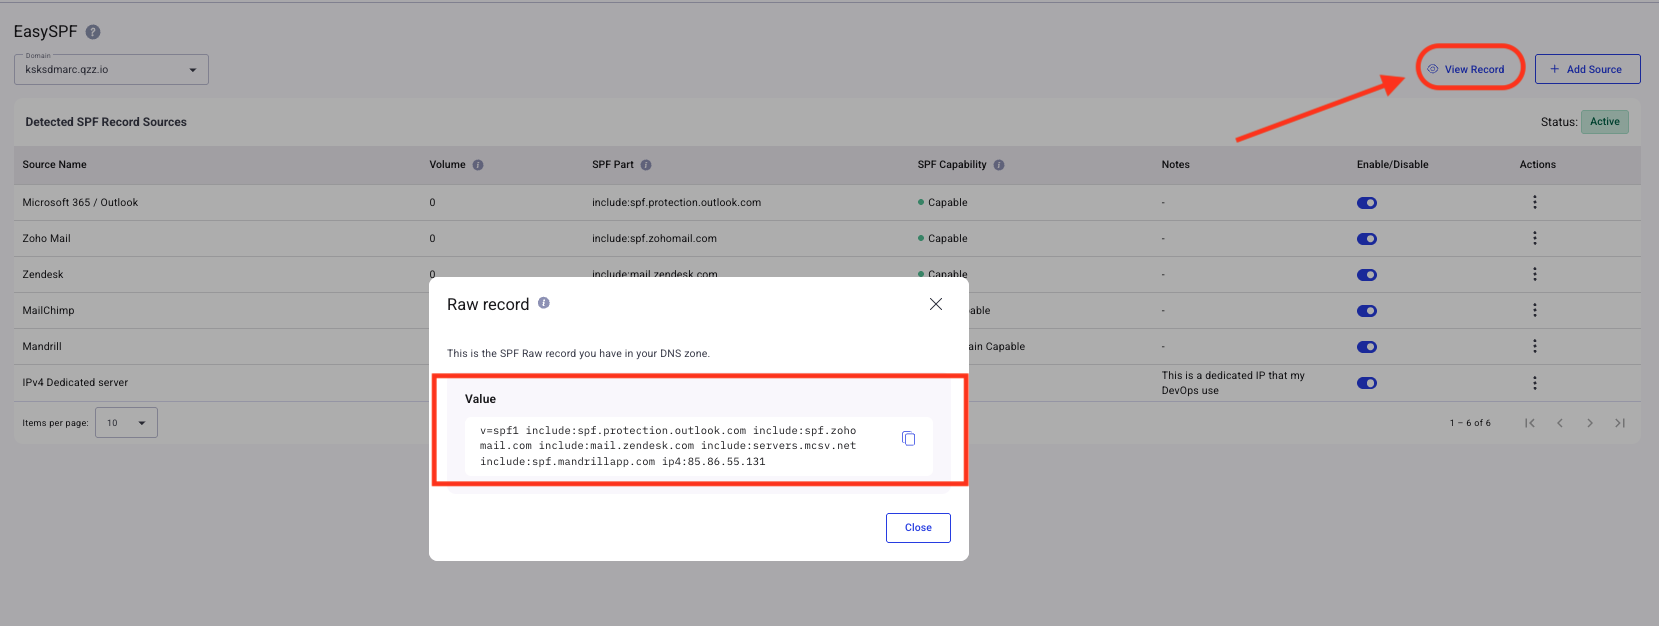
6. If you would like to review your previous SPF record, rather than the one provided by EasySPF, you can click on the 'View Raw Record' option.