
MTA-STS ensures that emails sent to your domain are securely transmitted using encryption. TLS Reporting provides insights into any issues encountered during email delivery, helping you monitor and improve your domain's email security.
Step 1: Navigate to the Managed MTA-STS section under Managed Solutions. Before activating the Managed MTA-STS Solution, click "Manage Configurations" in the upper-right corner to review your Policy Mode and other configuration details.
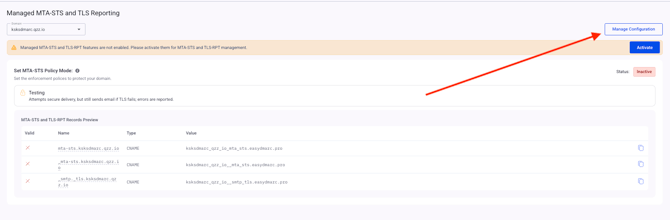
Step 2: From this section, you can manage your MTA-STS and TLS Reporting configurations both before and after activating the Managed MTA-STS Solution.
- MTA-STS Policy Mode: Select the MTA-STS policy mode you want to apply to your domain. Make sure you understand how each policy mode works before selecting one.
- MX Hosts: Specify the MX hosts that handle email for your domain. These should match the MX records published in your domain's DNS zone. EasyDMARC automatically detects and adds your domain's MX records.
- Maximum Age: Defines how long sending mail servers should cache your domain's MTA-STS policy. We recommend setting a value equivalent to several weeks or longer, but no more than 52 weeks.
- Set TLS Reporting Destination: Specifies where sending mail servers should deliver TLS reporting data, including statistics and information about TLS failures encountered during email transmission. EasyDMARC automatically assigns a TLS Reporting destination to your domain, similar to the reporting destinations used for Aggregate and Failure Reports. This allows you to view your TLS reports under Reporting > TLS.
If you want to receive TLS reports at an email address of your own, click Add New to add an additional TLS Reporting destination.
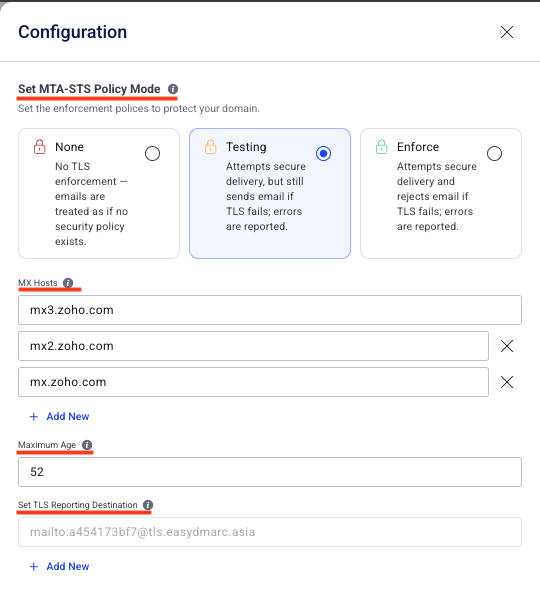
Step 3: Once you have configured the settings, click "Save". Then, return to the Managed MTA-STS dashboard and click on the "Activate" button to begin the activation process.
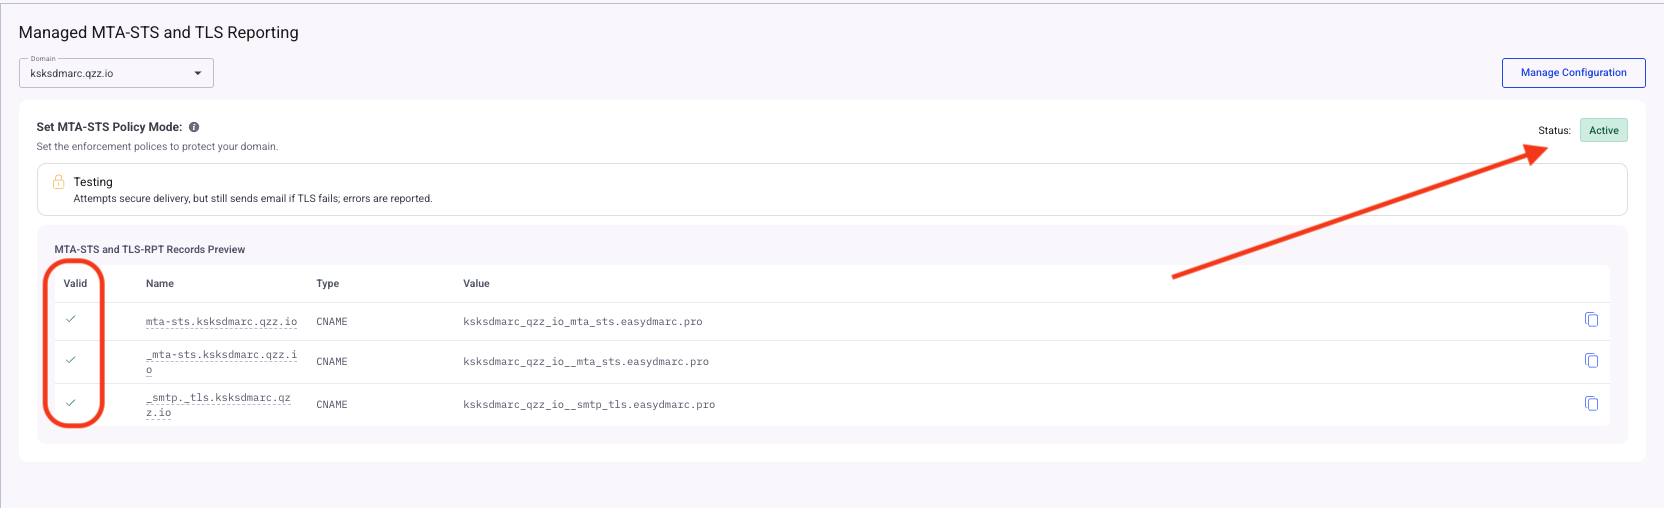
Step 4: You’ll be provided with three CNAME records. These records will need to be added to your DNS.
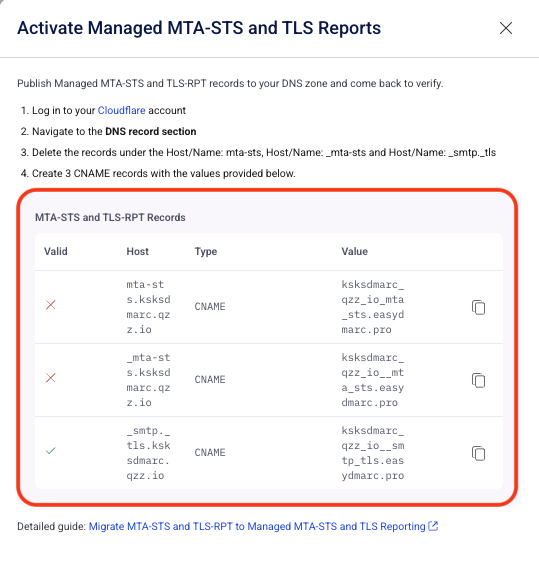
Step 5: In your DNS zone, enter the three CNAME records provided. For example:
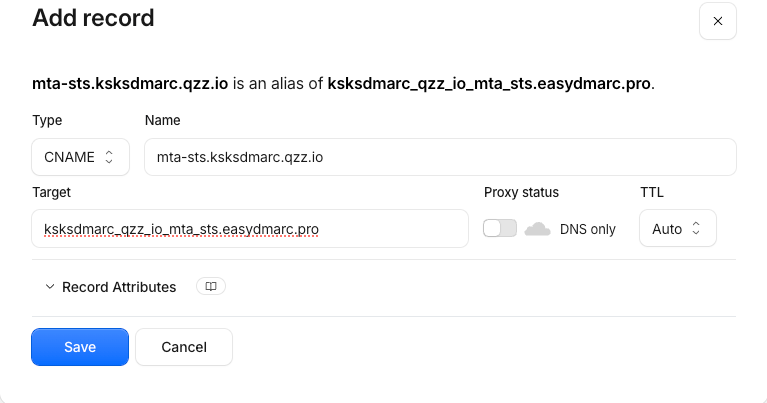

Note: If you're using Cloudflare make sure to turn off Cloudflare's Proxy Status.
Step 6: Once you have published the CNAME record and the DNS changes have successfully propagated, return to the Managed MTA-STS dashboard. After successful activation, you will see an Active status, confirming that MTA-STS and TLS Reporting have been successfully implemented.
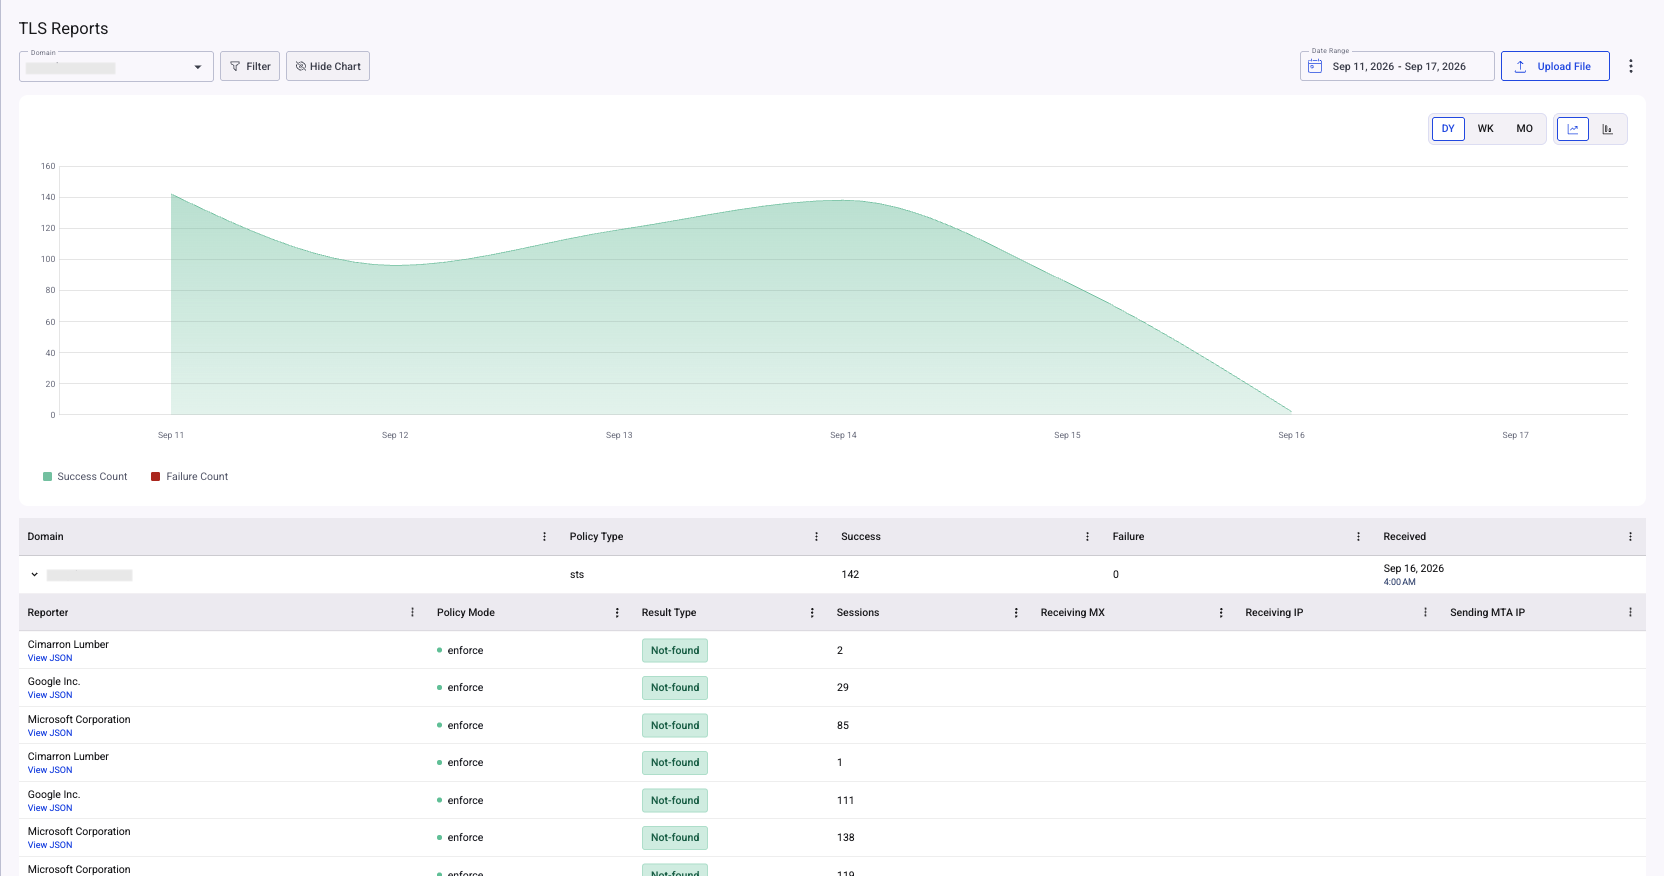
Step 7: Once everything is properly configured, you can monitor your TLS reports under Reporting > TLS. From there, you can access the TLS dashboard and review detailed report information.
In conclusion, implementing Managed MTA-STS and TLS Reporting ensures secure email communication and simplifies policy management through an intuitive dashboard, enhancing both email security and ease of administration.
If you experience any difficulties during the setup, please don’t hesitate to reach out or contact support for assistance.