
SendGrid is Twilio's cloud-based email delivery platform, used by developers and businesses to send transactional and marketing email at scale via API or SMTP, with built-in analytics for opens, clicks, bounces, and spam reports.
To integrate SendGrid with EasyDMARC, please check the steps below:
Prerequisites:
- An active Twilio SendGrid account.
- A verified sender identity (domain or single sender) in SendGrid.
- The 30 Days Additional Email Activity History add-on must be active on your SendGrid account (see below).
Required Credentials:
Field: API Key
Description: A SendGrid API key with the necessary permissions. Generated from the SendGrid dashboard. The key is displayed only once at creation time.
Setup Instructions:
Step 1: Activate the 30 Days Additional Email Activity History add-on.
Log in to your SendGrid account at app.sendgrid.com. Navigate to Settings → Account Details → Select "Your Product" → Scroll down and select Add-ons (or go directly to app.sendgrid.com/account/products/addons). Locate the 30 Days Additional Email Activity History add-on and activate it. This add-on extends your email activity data from the default 3–7 days to a full 30-day rolling window and enables programmatic access to email events via the Email Activity API.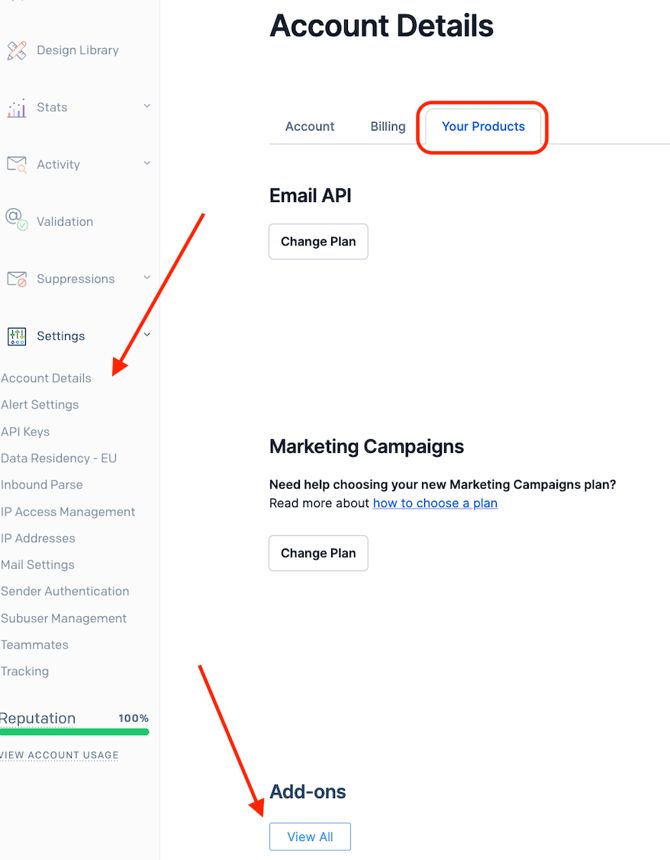
Important: Ensure the provided API Key has the necessary permissions and that the 30 Days Additional Email Activity History add-on is active on your account.
Step 2: Create an API key in SendGrid.
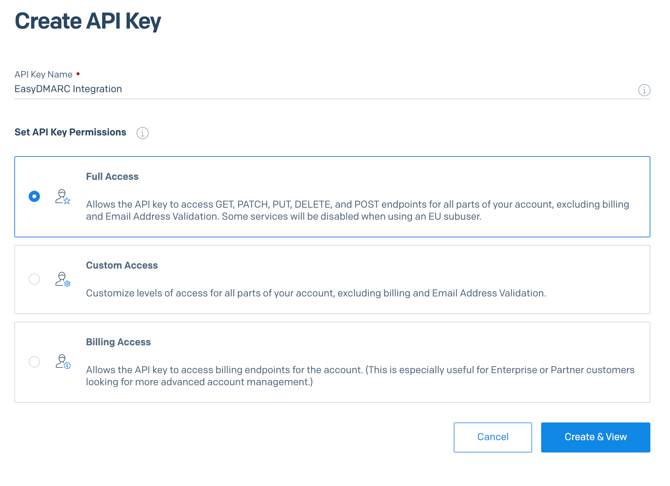
In the SendGrid dashboard, go to Settings → API Keys. Click the Create API Key button in the top right corner of the page.
Step 3: Configure the API key name and permissions.
Enter a descriptive name for your API key (e.g., "EasyDMARC Integration"). For permissions, select Full Access to ensure the key can authenticate all necessary endpoints. Alternatively, select Restricted Access and enable permissions for at minimum: Mail Send (Full Access), Email Activity (Read Access), Stats (Read Access), and Tracking (Read Access).
Step 4: Copy your API key.
Click Create & View. Your API key will be displayed. Copy it immediately and store it in a secure location. SendGrid will not show this key again. If you lose it, you will need to delete the key and create a new one.
Step 5: Enter the API key in EasyDMARC.
Navigate to Integrations → SendGrid → click "Connect Account". Paste the API key into the API Key field and click Save.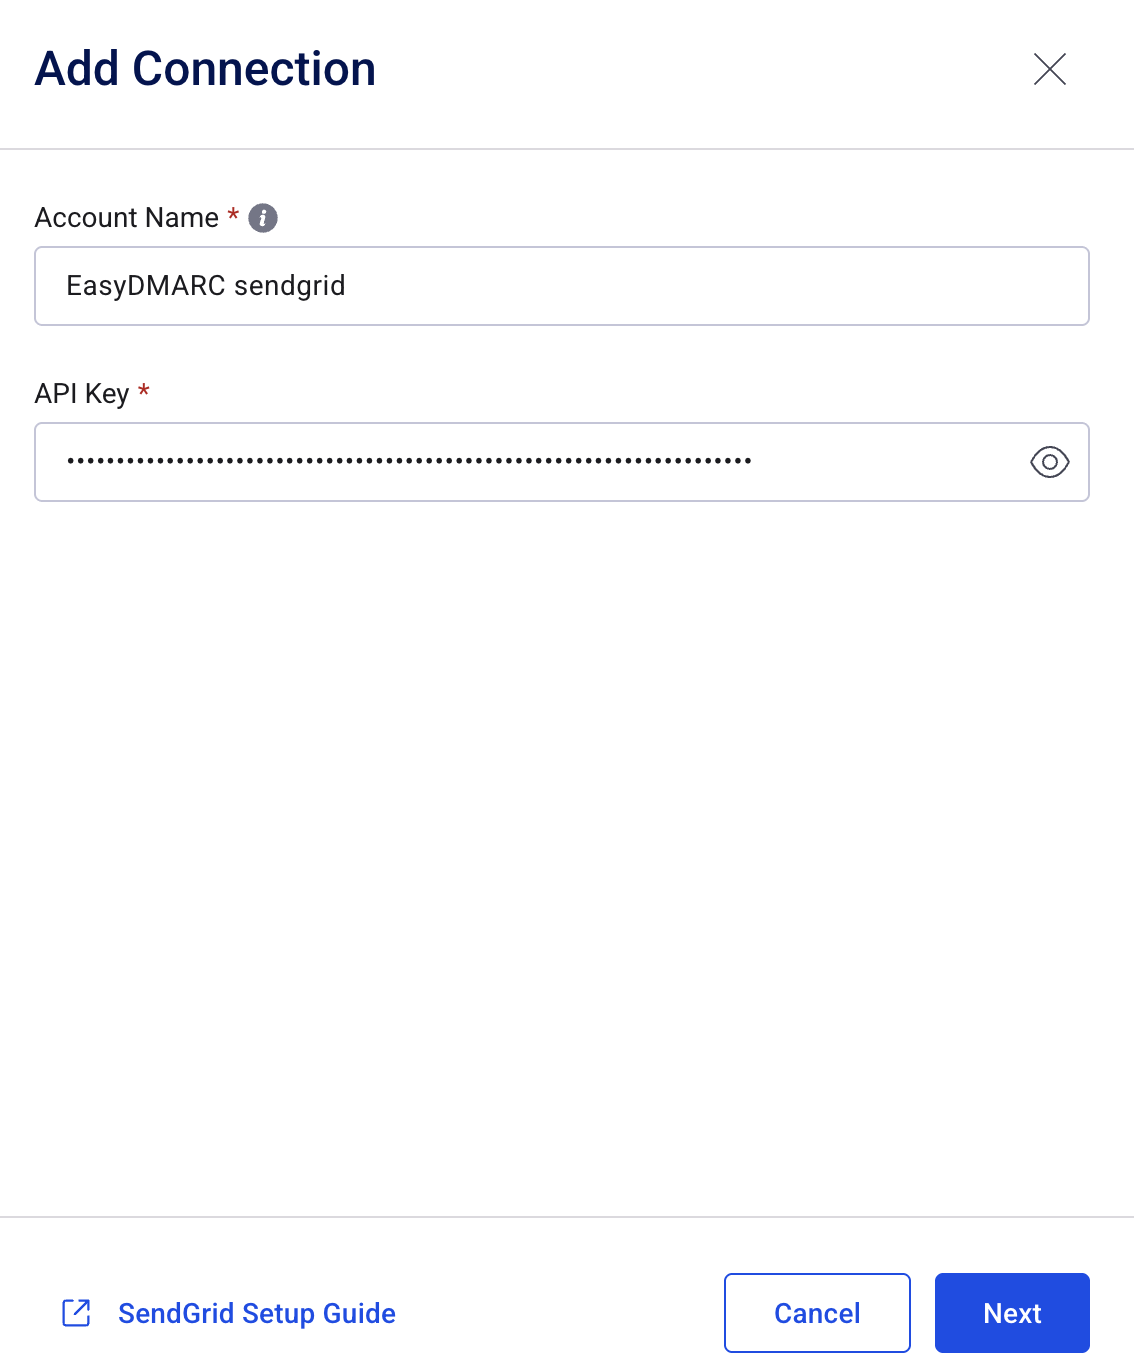
If there are still questions or concerns that remain uncovered after checking this article, you can contact EasyDMARC Technical Support.