
Salesforce is a customer relationship management (CRM) platform used by sales and marketing teams to manage leads, contacts, and email communications, with built-in tools for tracking email engagement and campaign performance.
To integrate Salesforce with EasyDMARC, please check the steps below:
Prerequisites:
- You must be a Salesforce System Administrator.
- You must have "Enhanced Email" enabled (Standard in most modern Orgs).
Step 1: Enable Email Tracking
To ensure EasyDMARC can display Open rates, you must confirm tracking is active.
1. Log in to Salesforce Setup.
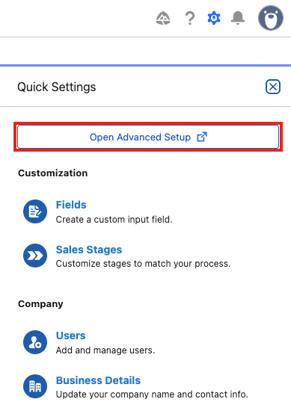
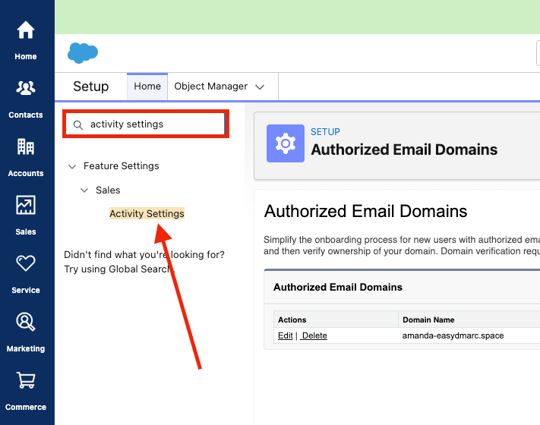
2. In the Quick Find box, type Activity Settings.
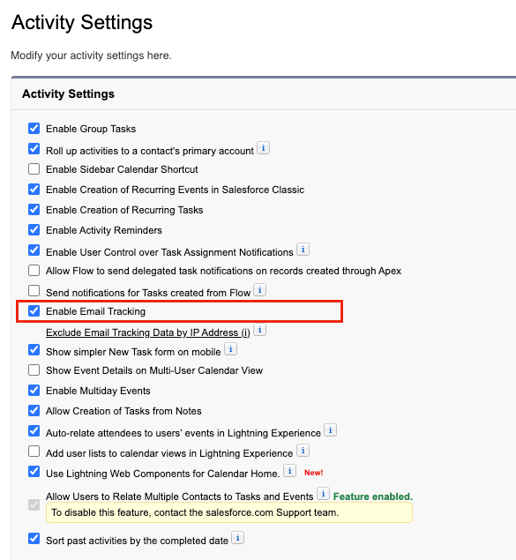
3. Check the box for Enable Email Tracking.
4. Click Submit.
Step 2: Create a Connected App
This generates the API keys EasyDMARC needs to connect.
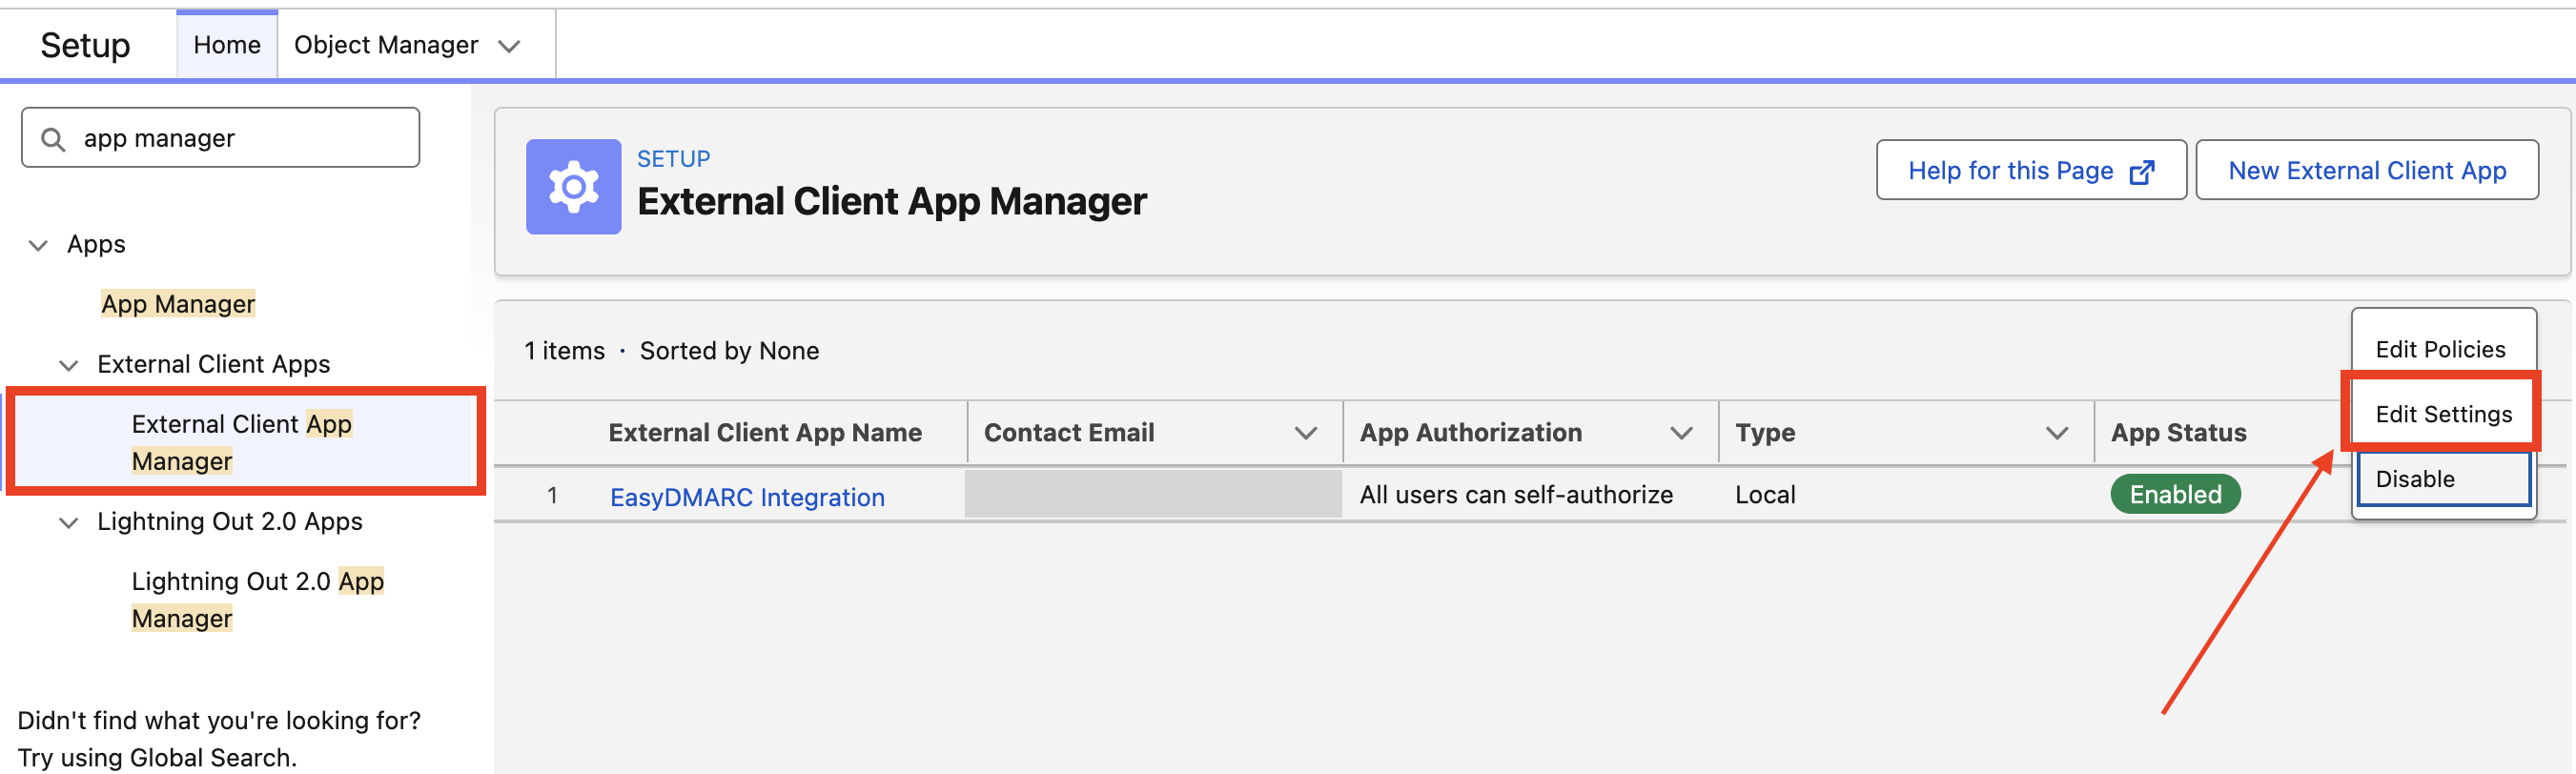
1. In Setup, search for App Manager.
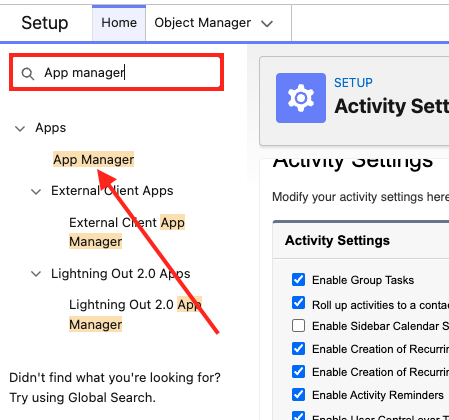
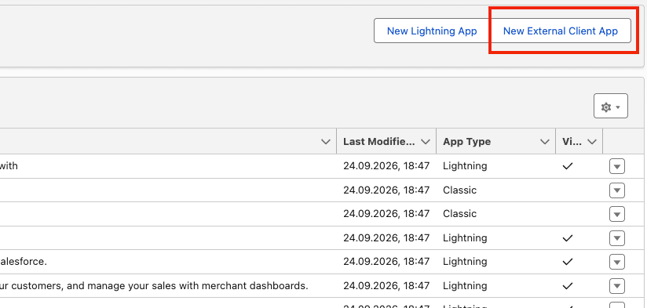
2. Click New External Client App (top right).
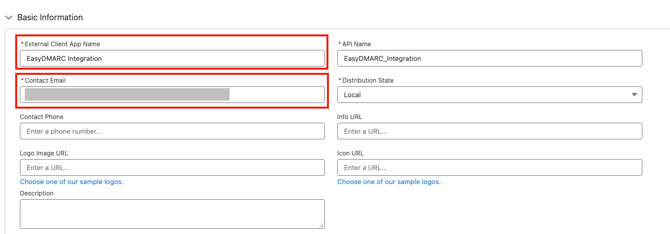
3. Basic Information:
- Connected App Name: EasyDMARC Integration
- Contact Email: Your email address.
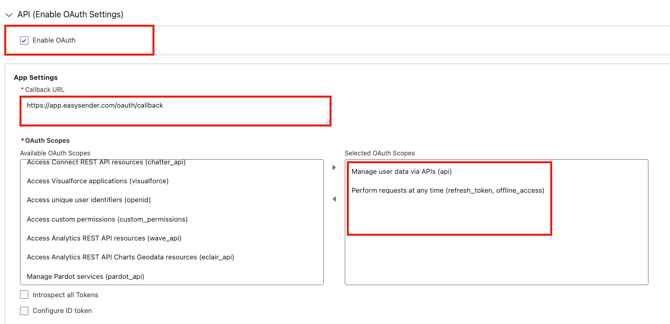
4. API (Enable OAuth Settings):
- Check Enable OAuth Settings.
- Callback URL: Enter [CALLBACK URL — see note below]
- Selected OAuth Scopes: Move the following scopes to the "Selected" list:
- Manage user data via APIs (api)
- Perform requests at any time (refresh_token, offline_access)
5. Click Create.
6. Note: It may take 2-10 minutes for the app to propagate on Salesforce servers.
Step 3: Connect to EasyDMARC
1. In the App Manager list, find your new EasyDMARC Integration and click the Dropdown arrow > Edit Settings.
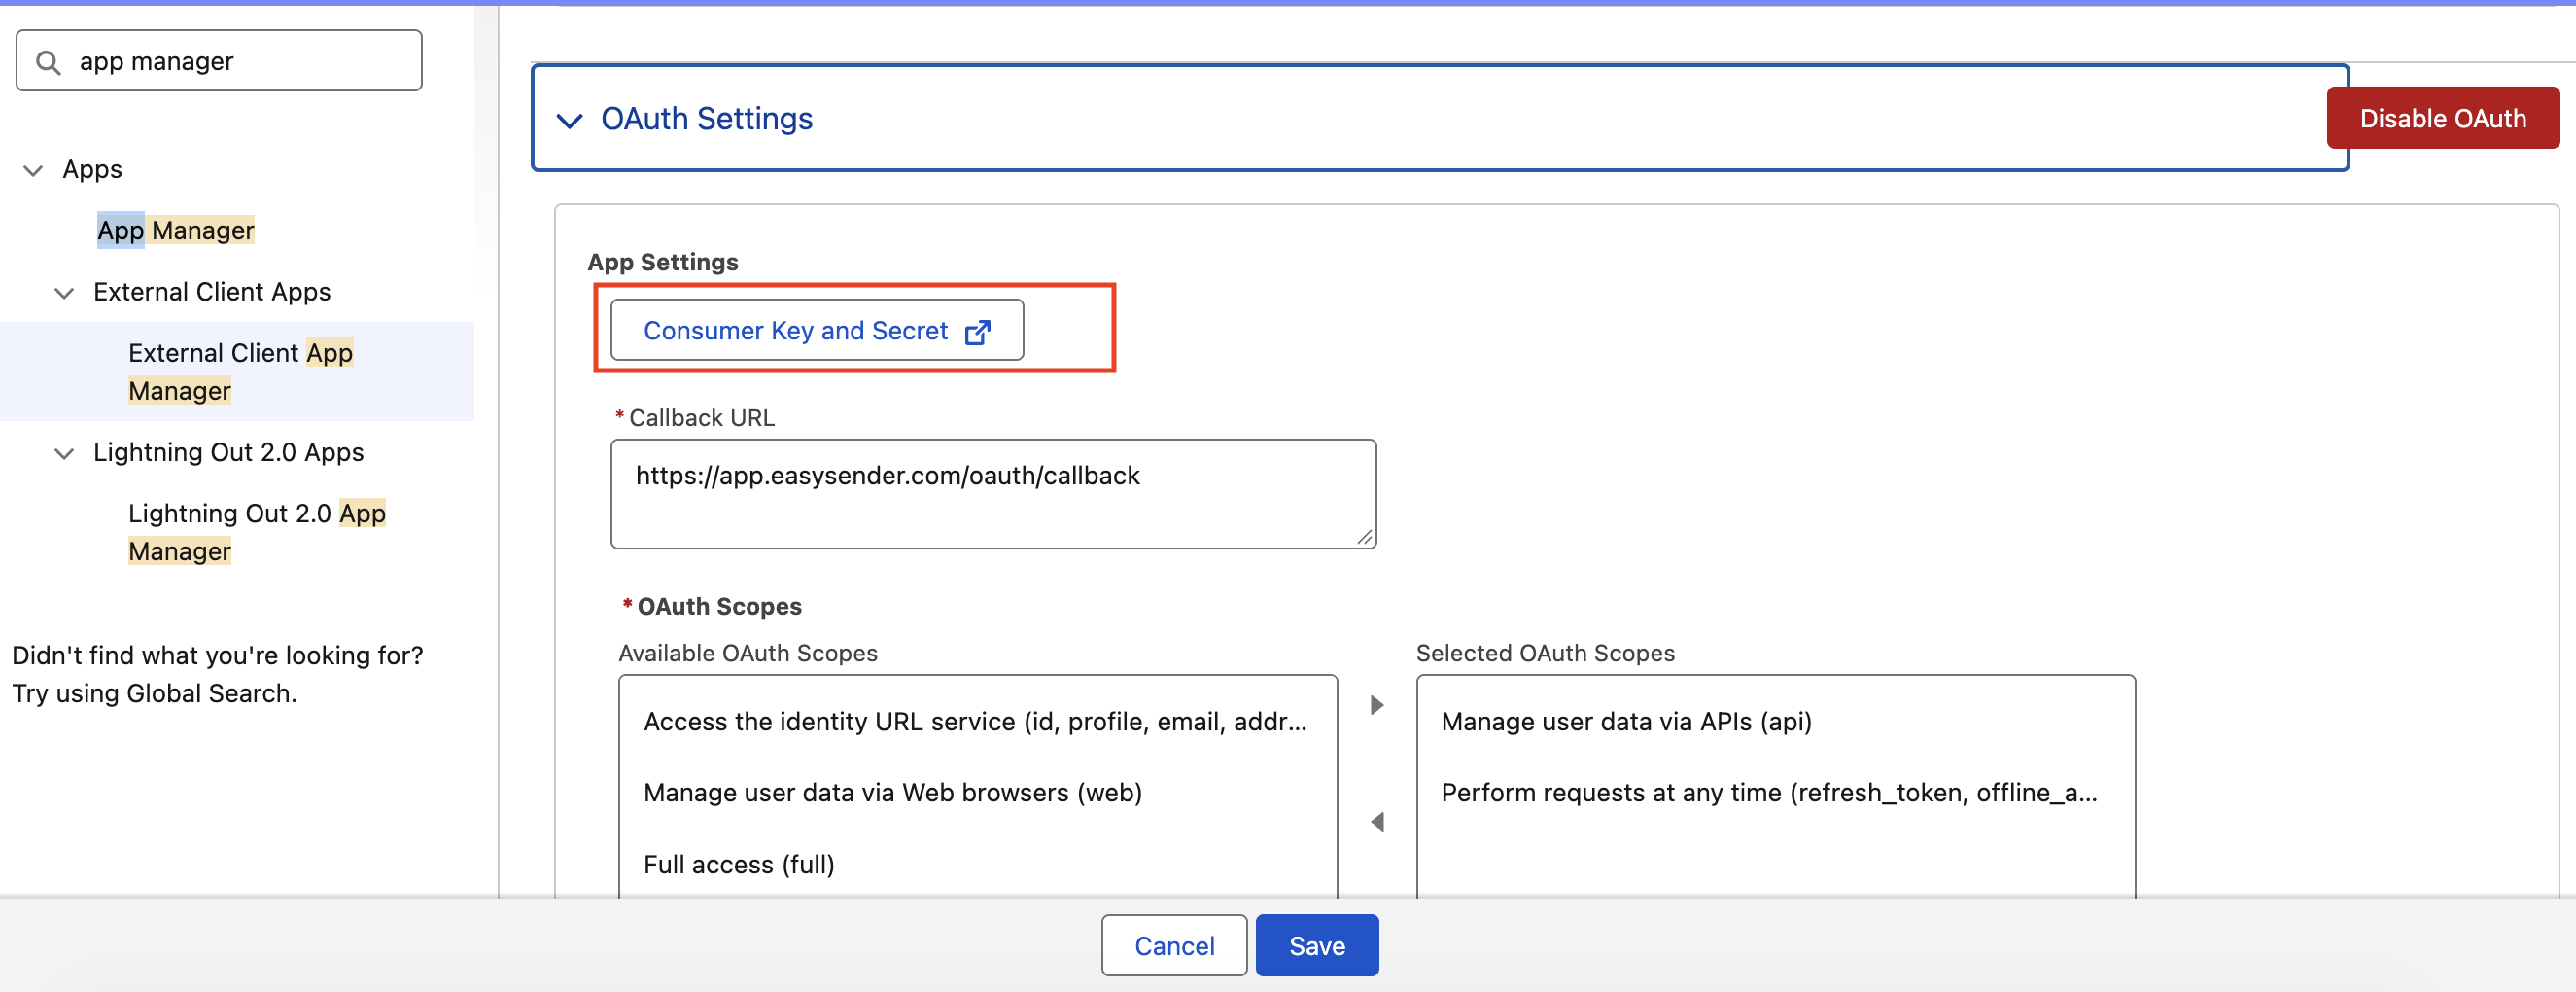
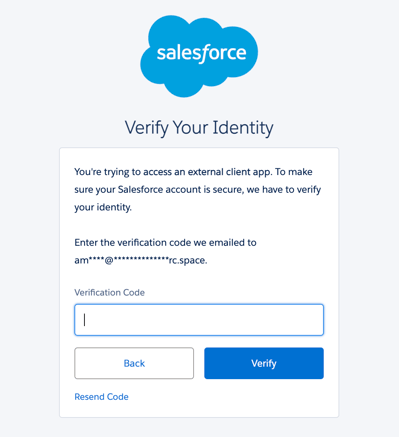
2. Locate and select the Consumer Key and Secret button. (You may be asked to verify your identity.)
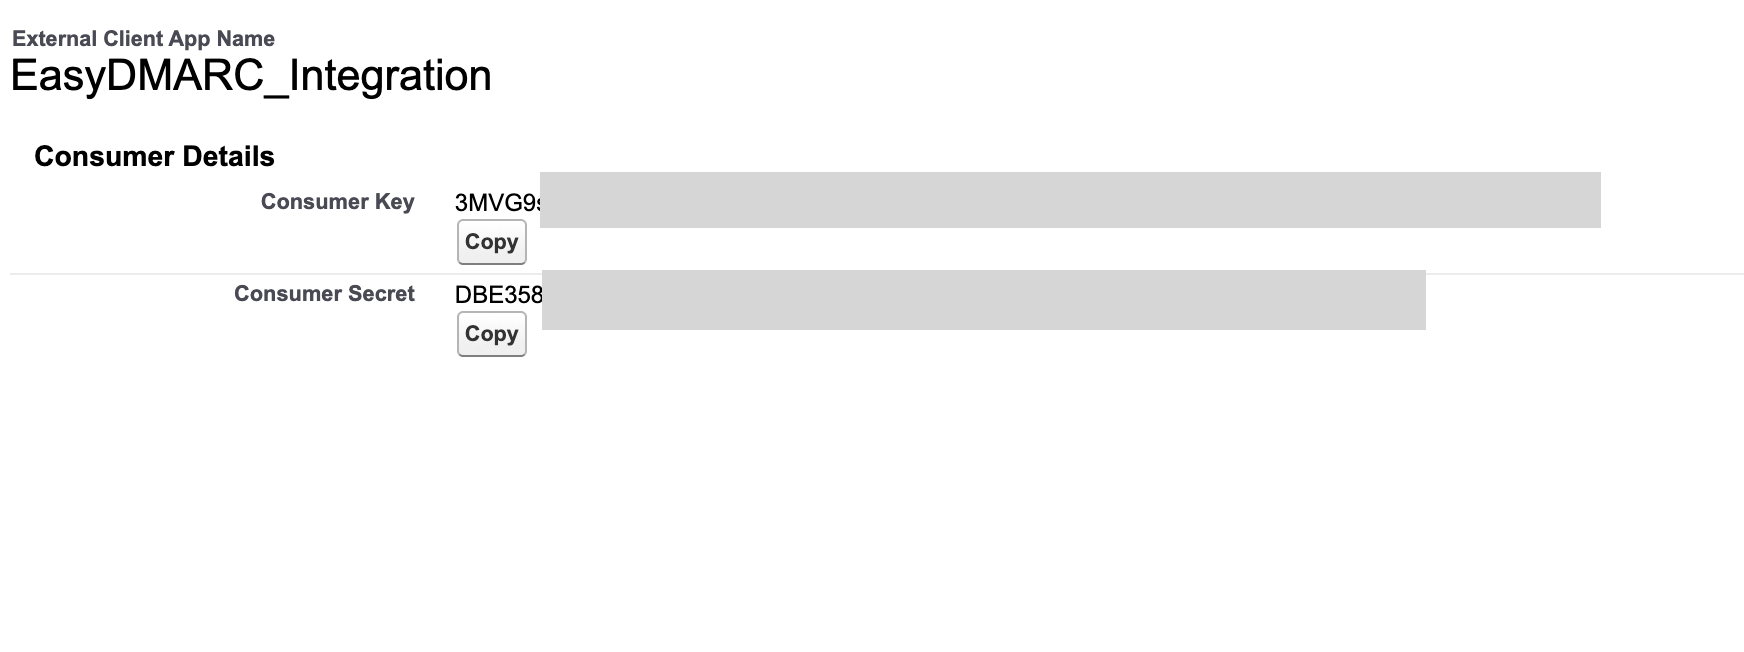
3. Copy the Consumer Key and Consumer Secret.
4. Paste these credentials into your EasyDMARC Dashboard to complete the connection.
If there are still questions or concerns that remain uncovered after checking this article, you can contact EasyDMARC Technical Support.
To integrate Salesforce with EasyDMARC, please check the steps below:
Prerequisites:
- You must be a Salesforce System Administrator.
- You must have "Enhanced Email" enabled (Standard in most modern Orgs).
Step 1: Enable Email Tracking
To ensure EasyDMARC can display Open rates, you must confirm tracking is active.
1. Log in to Salesforce Setup.
2. In the Quick Find box, type Activity Settings.
3. Check the box for Enable Email Tracking.
4. Click Submit.
Step 2: Create a Connected App
This generates the API keys EasyDMARC needs to connect.
1. In Setup, search for App Manager.
2. Click New External Client App (top right).
3. Basic Information:
- Connected App Name: EasyDMARC Integration
- Contact Email: Your email address.
4. API (Enable OAuth Settings):
- Check Enable OAuth Settings.
- Callback URL: Enter [CALLBACK URL — see note below]
- Selected OAuth Scopes: Move the following scopes to the "Selected" list:
- Manage user data via APIs (api)
- Perform requests at any time (refresh_token, offline_access)
5. Click Create.
6. Note: It may take 2-10 minutes for the app to propagate on Salesforce servers.
Step 3: Connect to EasyDMARC
1. In the App Manager list, find your new EasyDMARC Integration and click the Dropdown arrow > Edit Settings.
2. Locate and select the Consumer Key and Secret button. (You may be asked to verify your identity.)
3. Copy the Consumer Key and Consumer Secret.
4. Paste these credentials into your EasyDMARC Dashboard to complete the connection.
If there are still questions or concerns that remain uncovered after checking this article, you can contact EasyDMARC Technical Support.