
This guide walks you through setting up SAML-based Single Sign-On (SSO) between Okta and EasyDMARC, so your team can sign in with their existing Okta credentials instead of a separate password.
Before you begin, make sure you have administrator access to your Okta portal, access to your domain’s DNS settings (to add a TXT verification record), and access to the SSO portal in your EasyDMARC account.
Note that once SSO is enabled, it must be enforced across your entire organization, so plan to share the new login process with your team.
Configuration Steps:
After logging in to your Okta account, open the Okta Admin Console from the top-left corner. Navigate to Applications and Resources → Applications, then click Create App Integration to begin setting up the integration.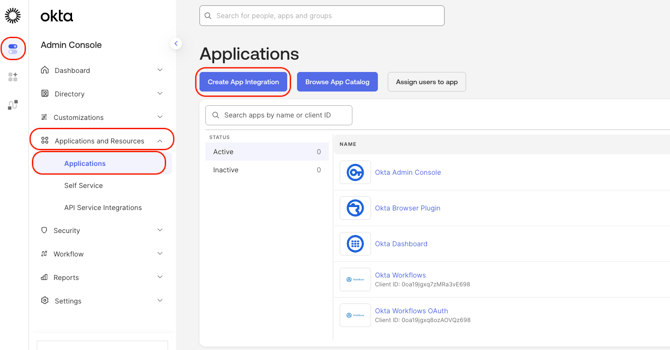
A new window will open. Navigate to the Classic experience tab, select SAML 2.0, and click Next.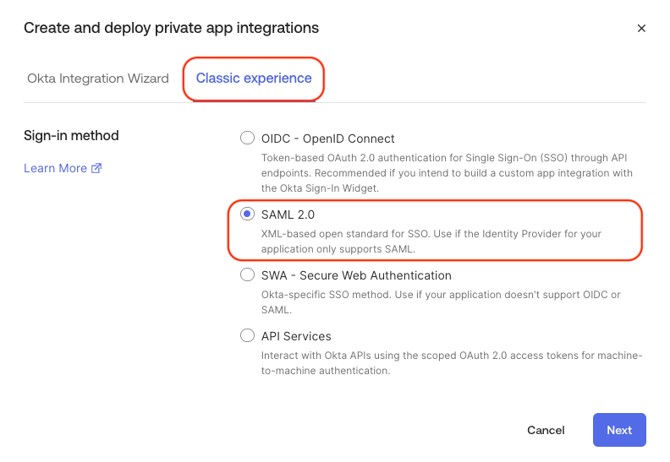
Under General Settings, enter the application name (e.g., EasyDMARC) in the App Name field, then click Next.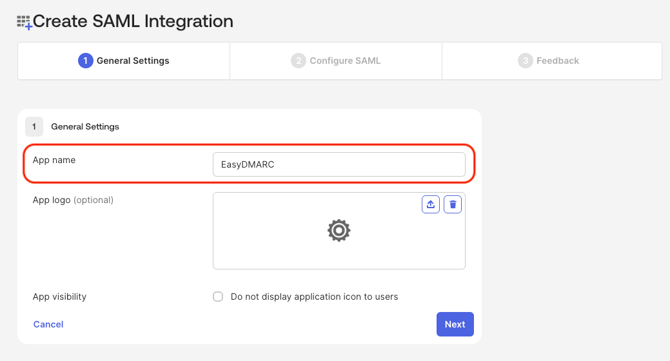
Under the Configure SAML tab, enter the following values in the corresponding fields:
-
Single sign-on URL:
https://uac.easydmarc.com/realms/easydmarc/broker/sso_d0ffe442-c7b3-40fa-bce0-17b9125cc580_172286792xxxx/endpoint/clients/saml_app -
Audience URI (SP Entity ID):
https://uac.easydmarc.com/realms/easydmarc
Note: The Single sign-on URL above is an example used only to generate the metadata file from Okta. In a later step, you will replace it with the specific URL provided by EasyDMARC.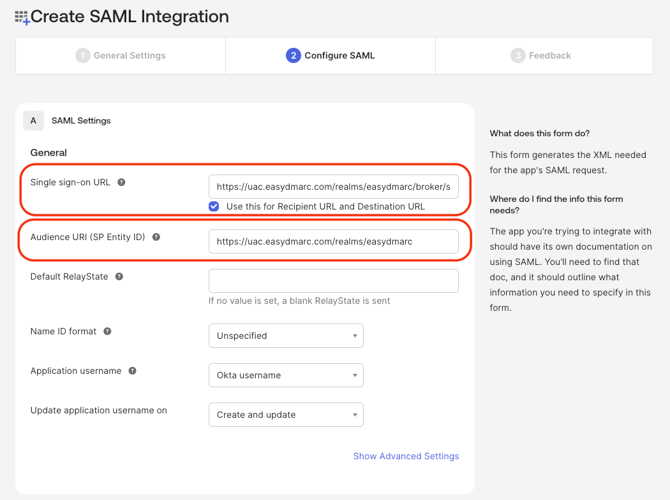
After entering the required values, scroll to the bottom of the window and click Next.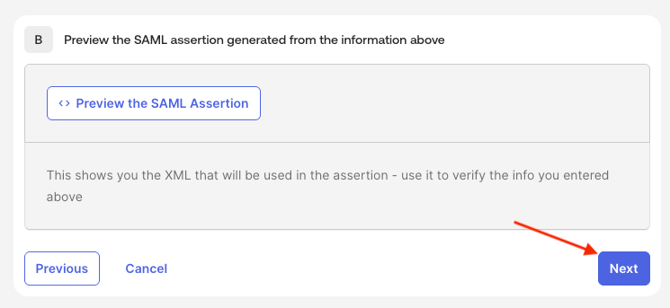
Under the Feedback tab, no changes are required. Simply click Finish to complete the setup.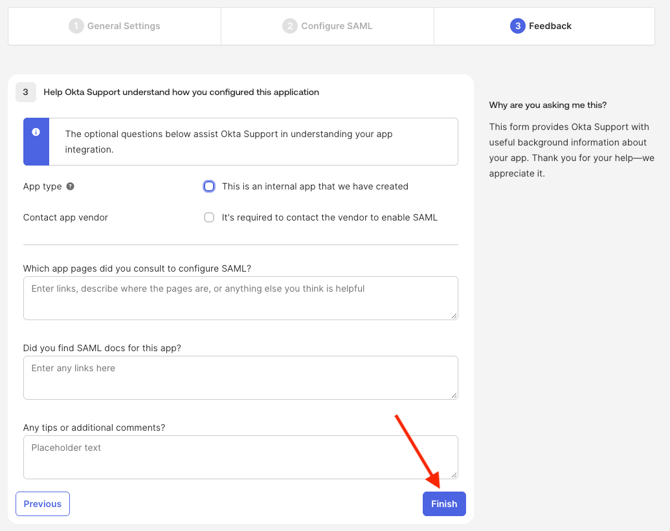
Once the setup is complete, a window will appear displaying the Metadata URL. Copy this URL, then navigate to your EasyDMARC Security Portal.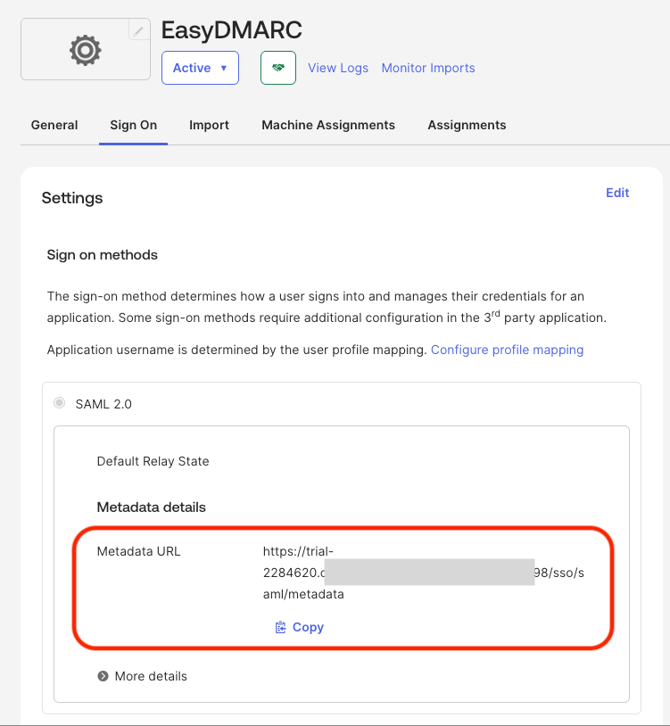
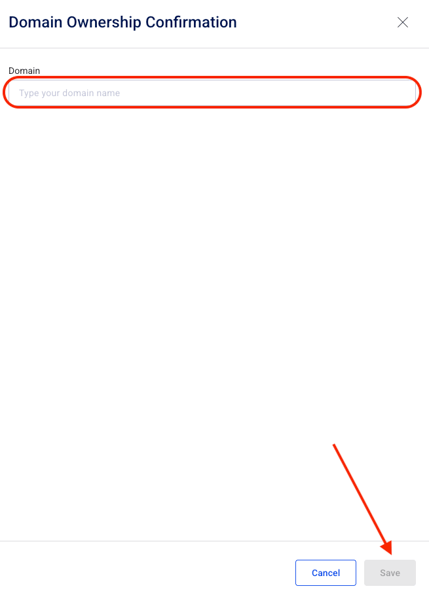
On the Single Sign-On page in EasyDMARC, click Confirm Domain Ownership to proceed.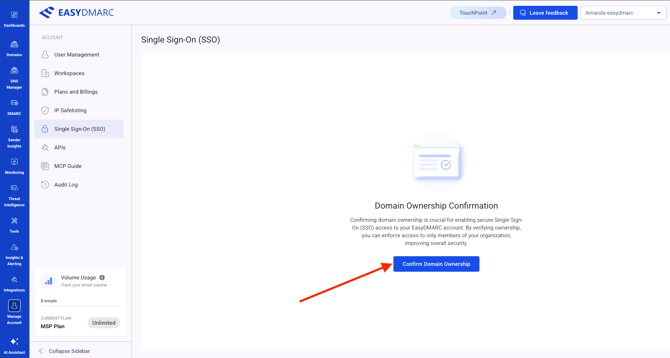
In the window that opens, type your domain name in the designated field, then click Save.
EasyDMARC will generate a DNS TXT record for domain ownership verification. Add the provided TXT record to your domain's DNS zone, then return to EasyDMARC and click Verify.
Note: DNS propagation may take several hours.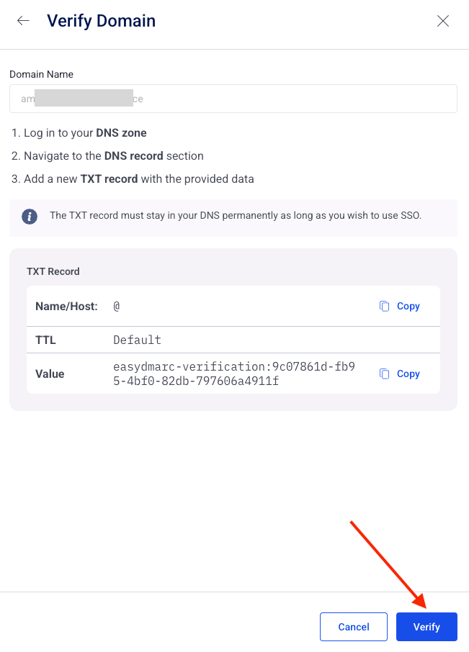
A confirmation window will appear, indicating that your domain ownership has been successfully verified. Click Done.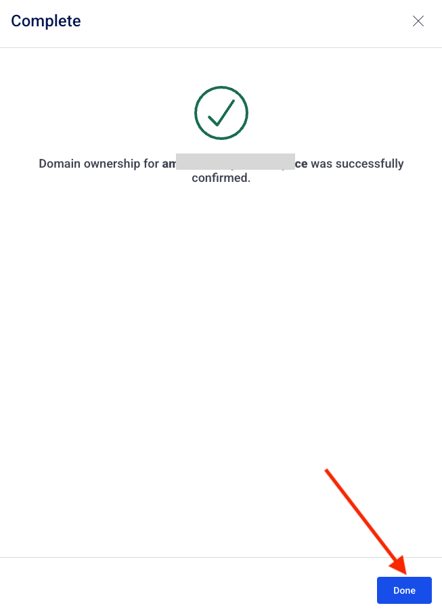
On the EasyDMARC Single Sign-On (SSO) setup page, select the Use URL option and paste the Metadata URL you previously copied from Okta into the designated field. Then click Validate and Save to complete the configuration.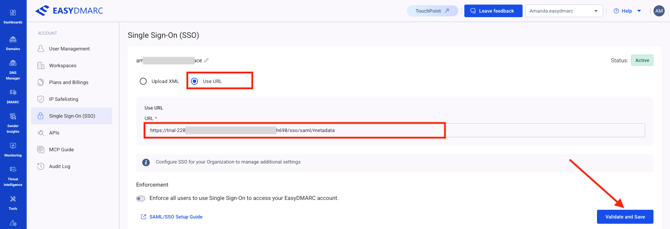
Important: Before proceeding with the SSO setup, make sure to disable any existing OAuth login options (Google, Microsoft, and LinkedIn) under Linked Accounts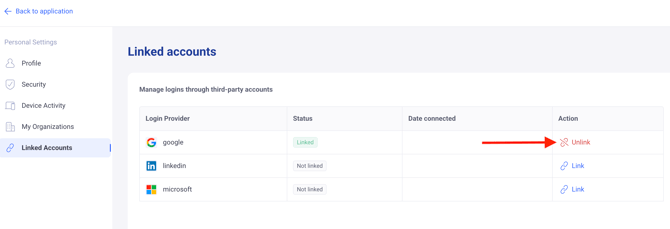
EasyDMARC will provide you with an Entity ID, ACS URL (Web/Redirect), ACS URL (SPPA/Mobile), and the required Attribute Statements. In the following steps, you will update these values in your Okta application configuration.
Important: Okta does not support configuring multiple URLs. Therefore, choose the appropriate ACS URL based on how your users will access EasyDMARC:
- IDP-initiated access or both IDP and SP-initiated access: Use the longer URL provided by EasyDMARC, which ends with /saml_app. This option allows users to access EasyDMARC through the Okta application or the EasyDMARC login page.
- SP-initiated access only: Use the shorter URL, which ends with /endpoint. This option allows users to access EasyDMARC exclusively through the EasyDMARC login page.
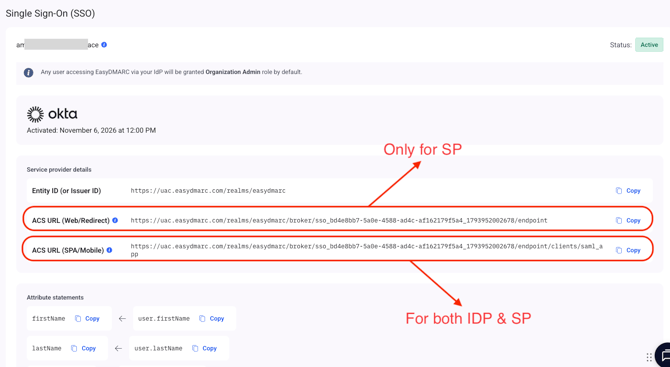
Copy the appropriate ACS URL provided by EasyDMARC in the previous step, based on your access requirements. Then, navigate to Applications in Okta and select your EasyDMARC application.
Go to General → SAML Settings and click Edit.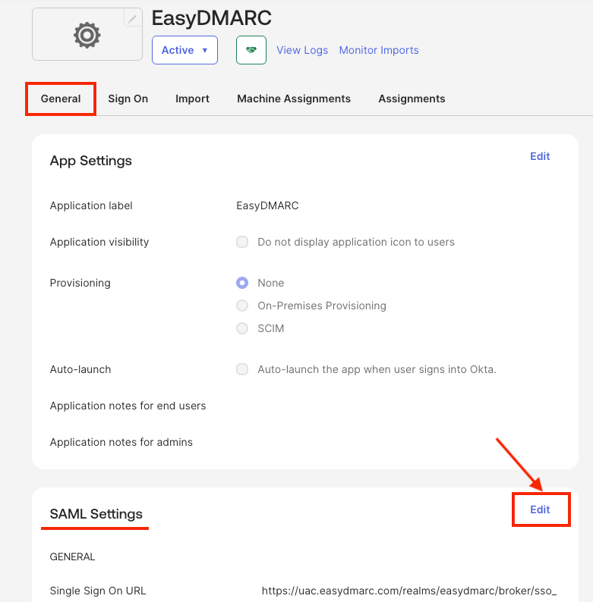
Under the Configure SAML tab, replace the existing value in the Single sign-on URL field with the ACS URL you copied from EasyDMARC, then click Next and Save to proceed.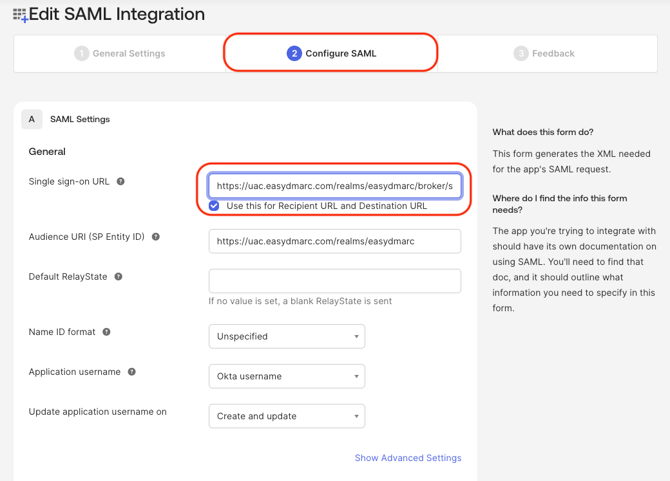
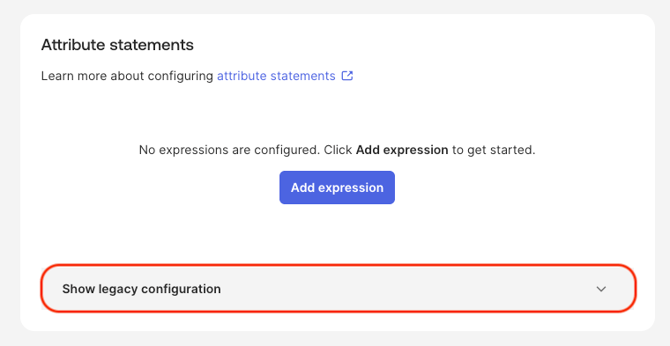
Go to Sign On → Attribute statements and click Show legacy configuration.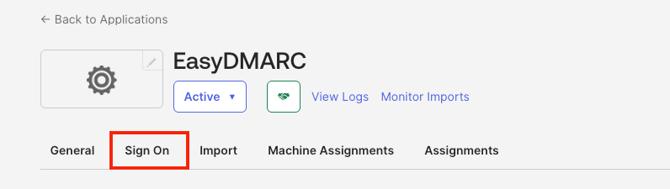
Under Profile Attribute Statements, click Edit and add the three Name/Value attribute pairs provided on your EasyDMARC SSO setup page. Make sure that all three attributes are entered correctly and match the values shown in the following screenshot. Click on Save.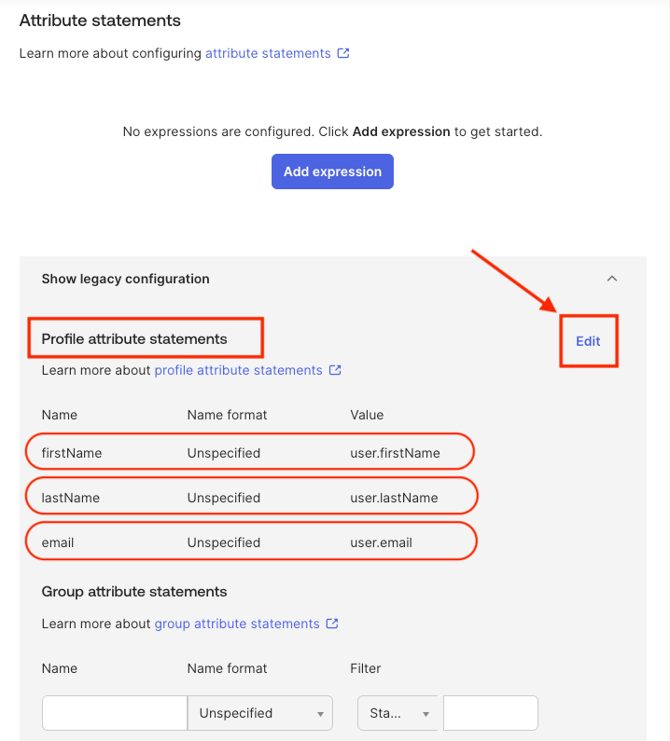
As a final step, navigate to the Assignments tab in your EasyDMARC application in Okta and assign the application to the users who need access to EasyDMARC through Okta.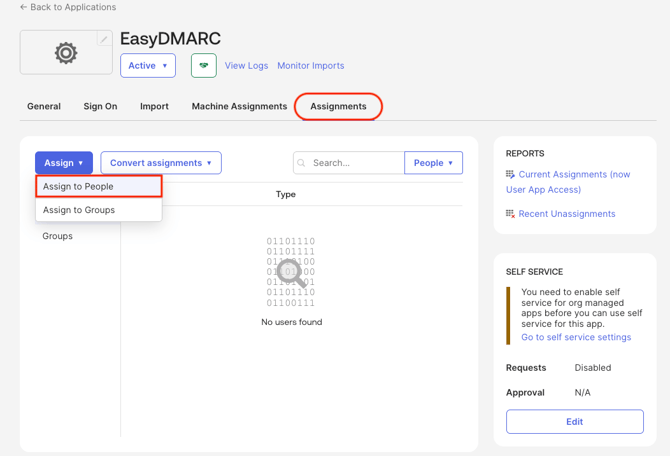
Important: With the current implementation, SSO must be enforced across the entire organization to function correctly. Without SSO enforcement, users will not be able to sign in through SSO as expected.
To enable enforcement, navigate to the Enforcement section on your EasyDMARC SSO setup page and toggle the setting on.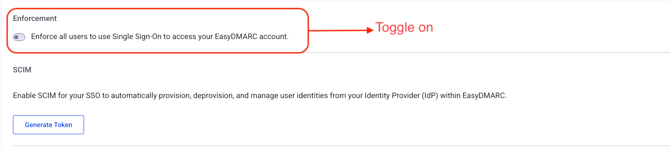
When prompted for confirmation, click Enable to apply the changes.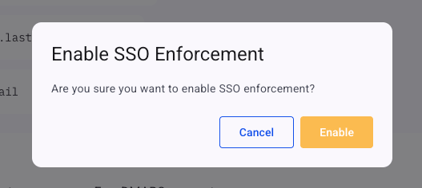
You have now completed the SSO configuration. To finalize the setup, follow the steps below to link your existing EasyDMARC account to SSO. Make sure to inform your team about the new login procedure so all users are aware of how to link their accounts and access EasyDMARC.
- Log out of your EasyDMARC account.
- Open a new incognito/private browsing window and sign in to your EasyDMARC account by entering your email address directly on the login box.
Please avoid using the alternative sign-in options (Google, Microsoft, or LinkedIn), as these use OAuth authentication rather than SSO and may cause conflicts with the SSO configuration. Please make sure to communicate this instruction internally with your team as well.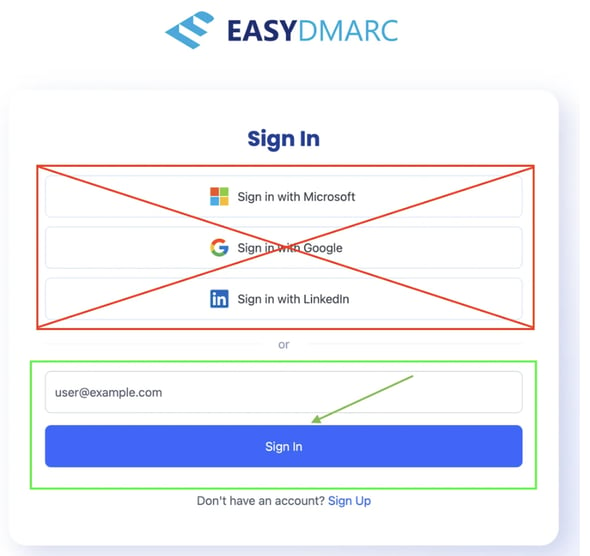
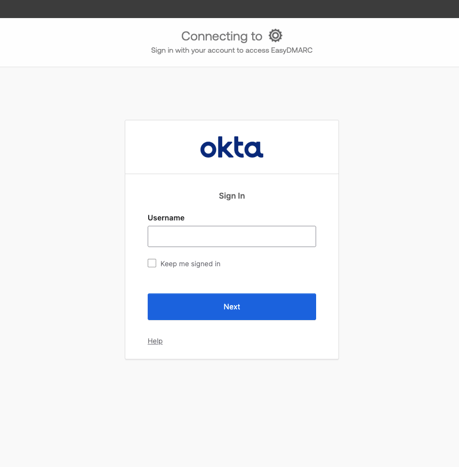
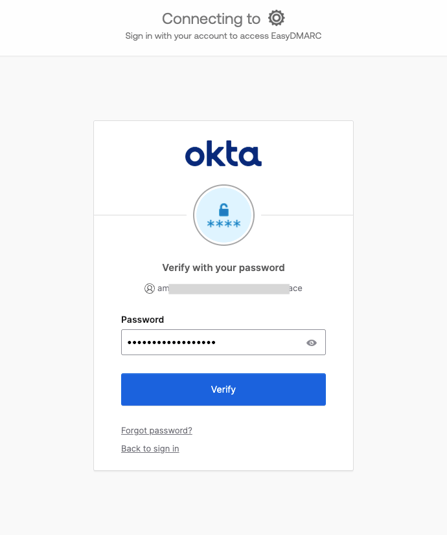
- You will be redirected to Okta, where you will be asked to enter your credentials.
-
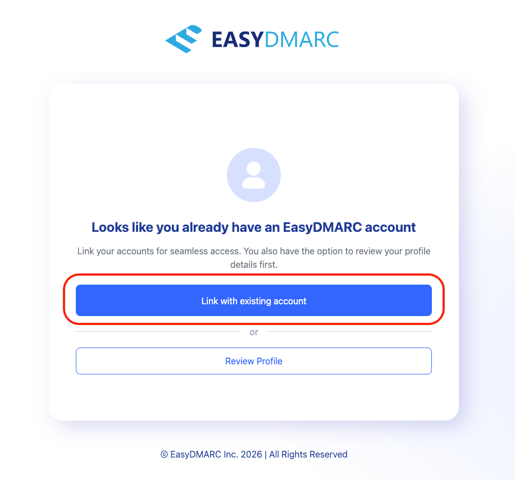
You will then be prompted to link your account. Select Link with Existing Account to initiate the account-linking process.
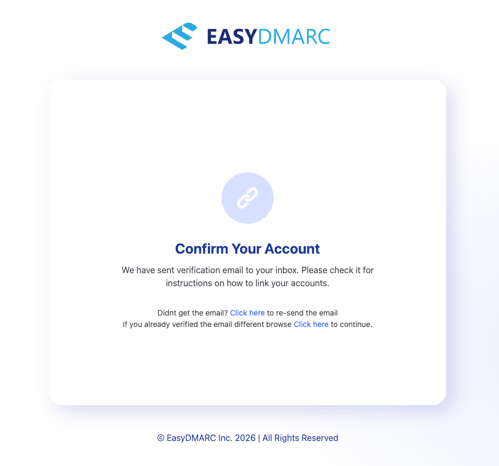
- A confirmation window will appear, indicating that a verification email has been sent to your inbox and prompting you to confirm your account.
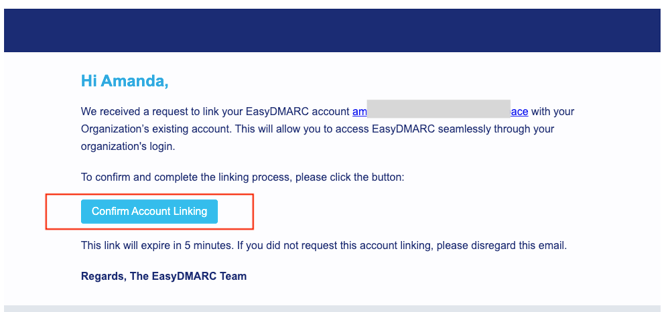
- Check your inbox for an email from EasyDMARC. Open the email and click the verification link to complete the account-linking process.
- Once you have completed the steps above, you should be able to log in to your EasyDMARC account successfully using SSO.
In case of any questions, feel free to reach out to EasyDMARC's Support team!