
Mandrill is Mailchimp's transactional email API service, used by developers to send automated, one-to-one emails like password resets, receipts, and notifications, with detailed delivery tracking and reputation monitoring built in.
To integrate Mandrill with EasyDMARC, please check the steps below:
Prerequisites:
- An active Mandrill (Mailchimp Transactional) account
- Admin access to generate API keys in Mandrill
- Access to your EasyDMARC Dashboard
Not sure if Mandrill is enabled on your account?
Log in to Mailchimp, go to Account → Integrations, and look for Transactional Email. If it is not visible, contact Mailchimp support to enable it on your plan. Mandrill is available on paid Mailchimp plans.
What this integration provides:
- Real-time per-message event tracking: sends, deliveries, opens, clicks, bounces, complaints
- Hard bounce vs. soft bounce vs. reject distinction
- Domain-level delivery reputation monitoring
- Events are streamed instantly via webhook — no polling delay
Step 1: Generate a Mandrill API Key
Before connecting in EasyDMARC, you need to create a dedicated API key in Mandrill with the correct permissions.
1. Open a new browser tab and go to: https://mandrillapp.com/settings/index
2. Click the "+ Create API Key" button.
3. In the description field, enter: "EasyDMARC Integration"
4. Ensure the key is granted at least the following permissions:
Permission: Users ping2
Why it is needed: Key validation on connect
Permission: Senders Domains, list
Why it is needed: Retrieve verified sending domain and sender information
Permission: Webhooks: List, add, delete
Why it is needed: Register EasyDMARC as a real-time event webhook endpoint
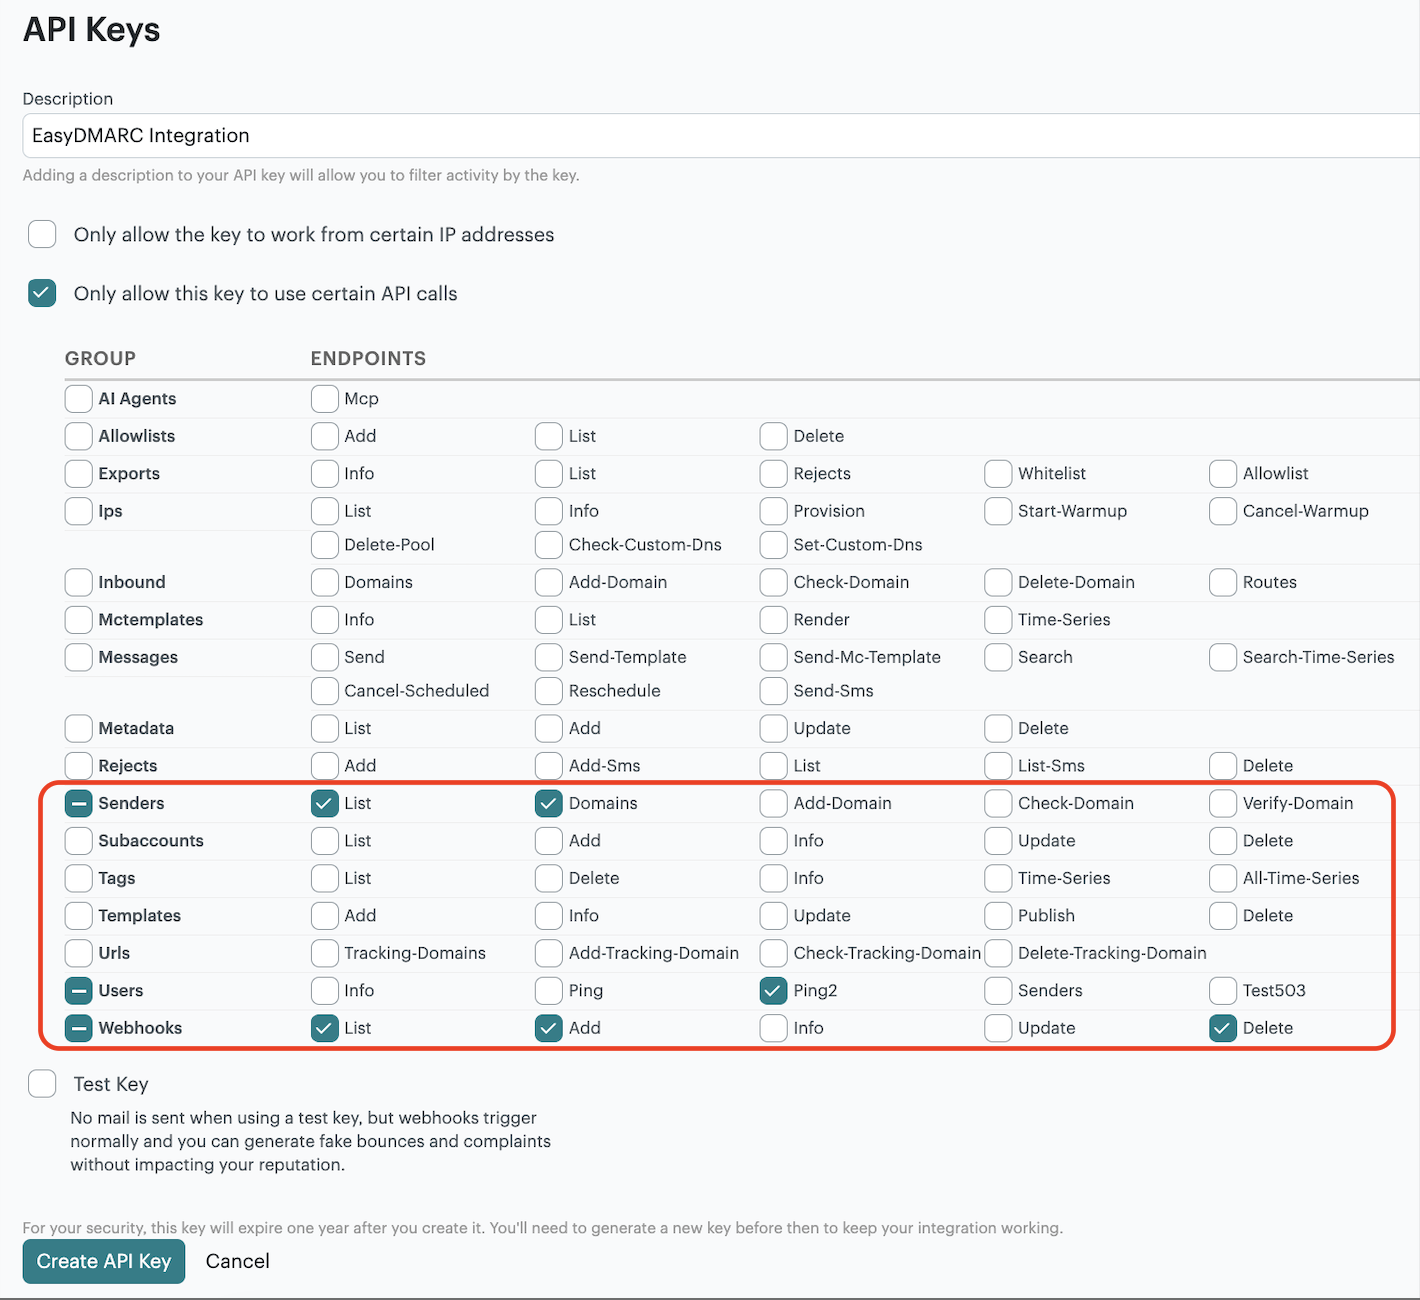
5. Click "Create API Key".
6. Copy the generated API key immediately — it will not be shown again.
Keep your API key safe: Store the copied key somewhere secure (e.g., a password manager) before continuing. If you lose it, you will need to generate a new key and reconnect the integration.
Step 2: Initiate the Connection in EasyDMARC
1. Log in to your EasyDMARC Dashboard.
2. Navigate to Integrations in the left-hand menu.
3. Locate the Mandrill card and click Connect.
4. In the Add Connection dialog, enter a recognizable Account Name.
5. Paste your Mandrill API key into the Mandrill API Key field.
6. Click "Connect".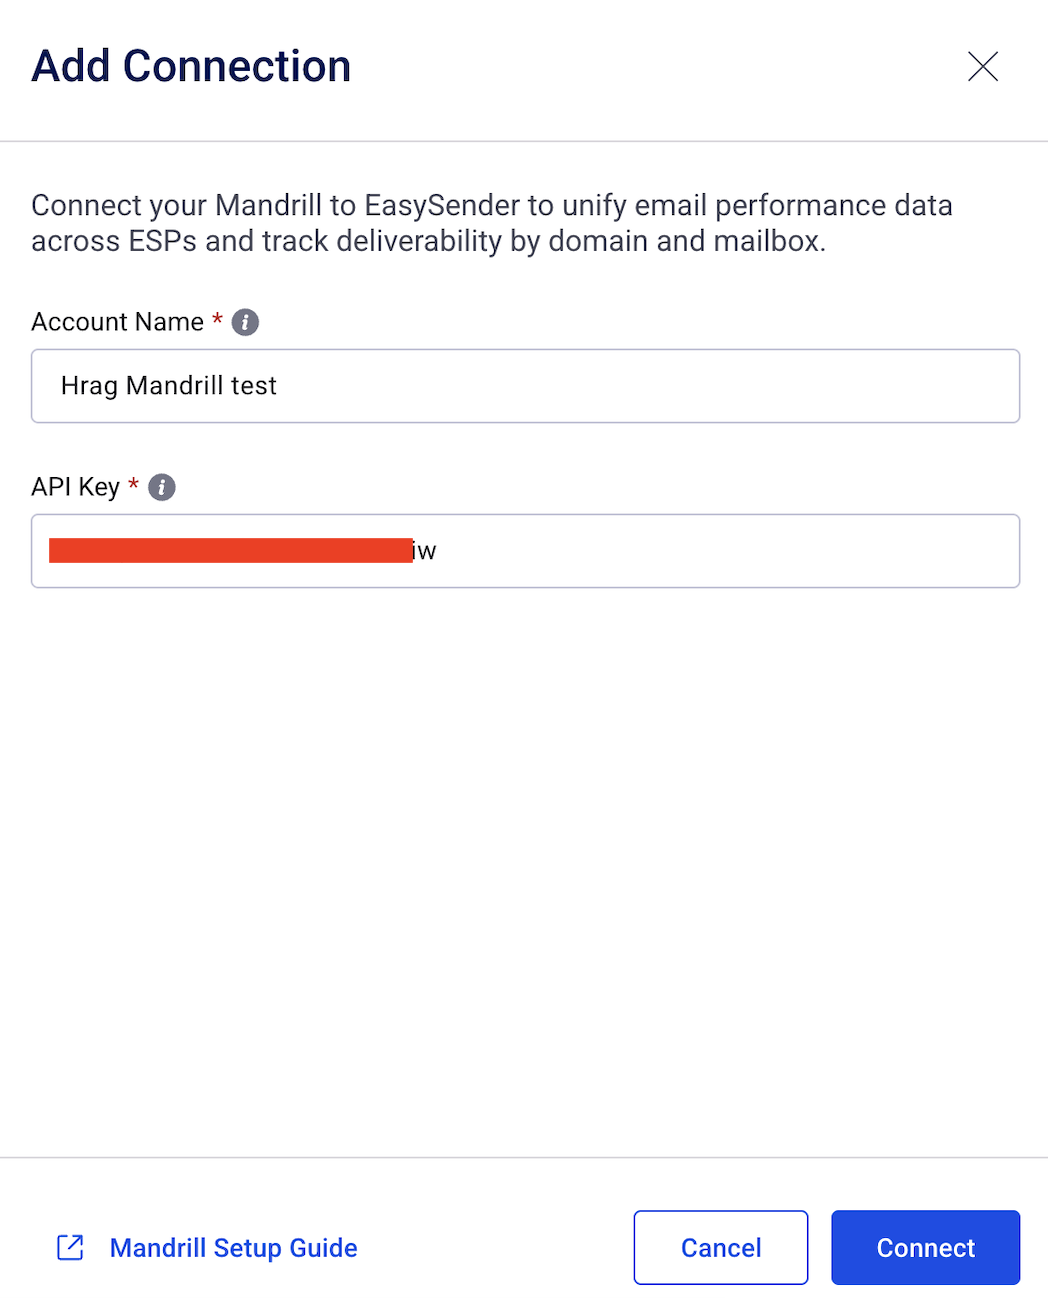
Step 3: Select Domains
After validation, EasyDMARC will display all verified sending domains detected in your Mandrill account.
1. Click on the Account Name then click Add Domain Review the list of detected domains.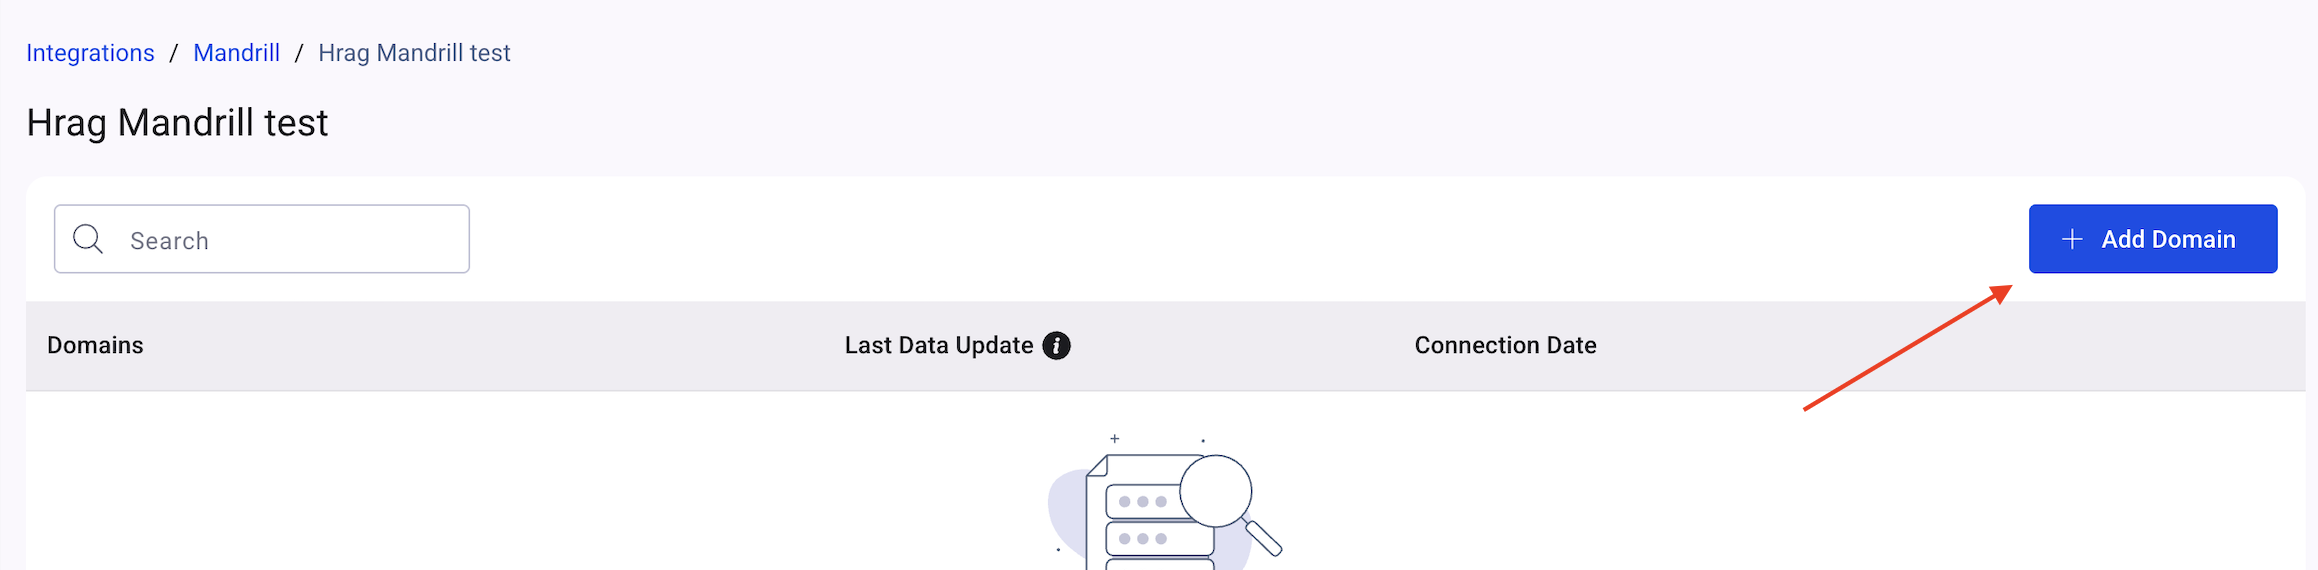
2. Check the box next to each domain you want to track in your dashboard.
3. Click "Add".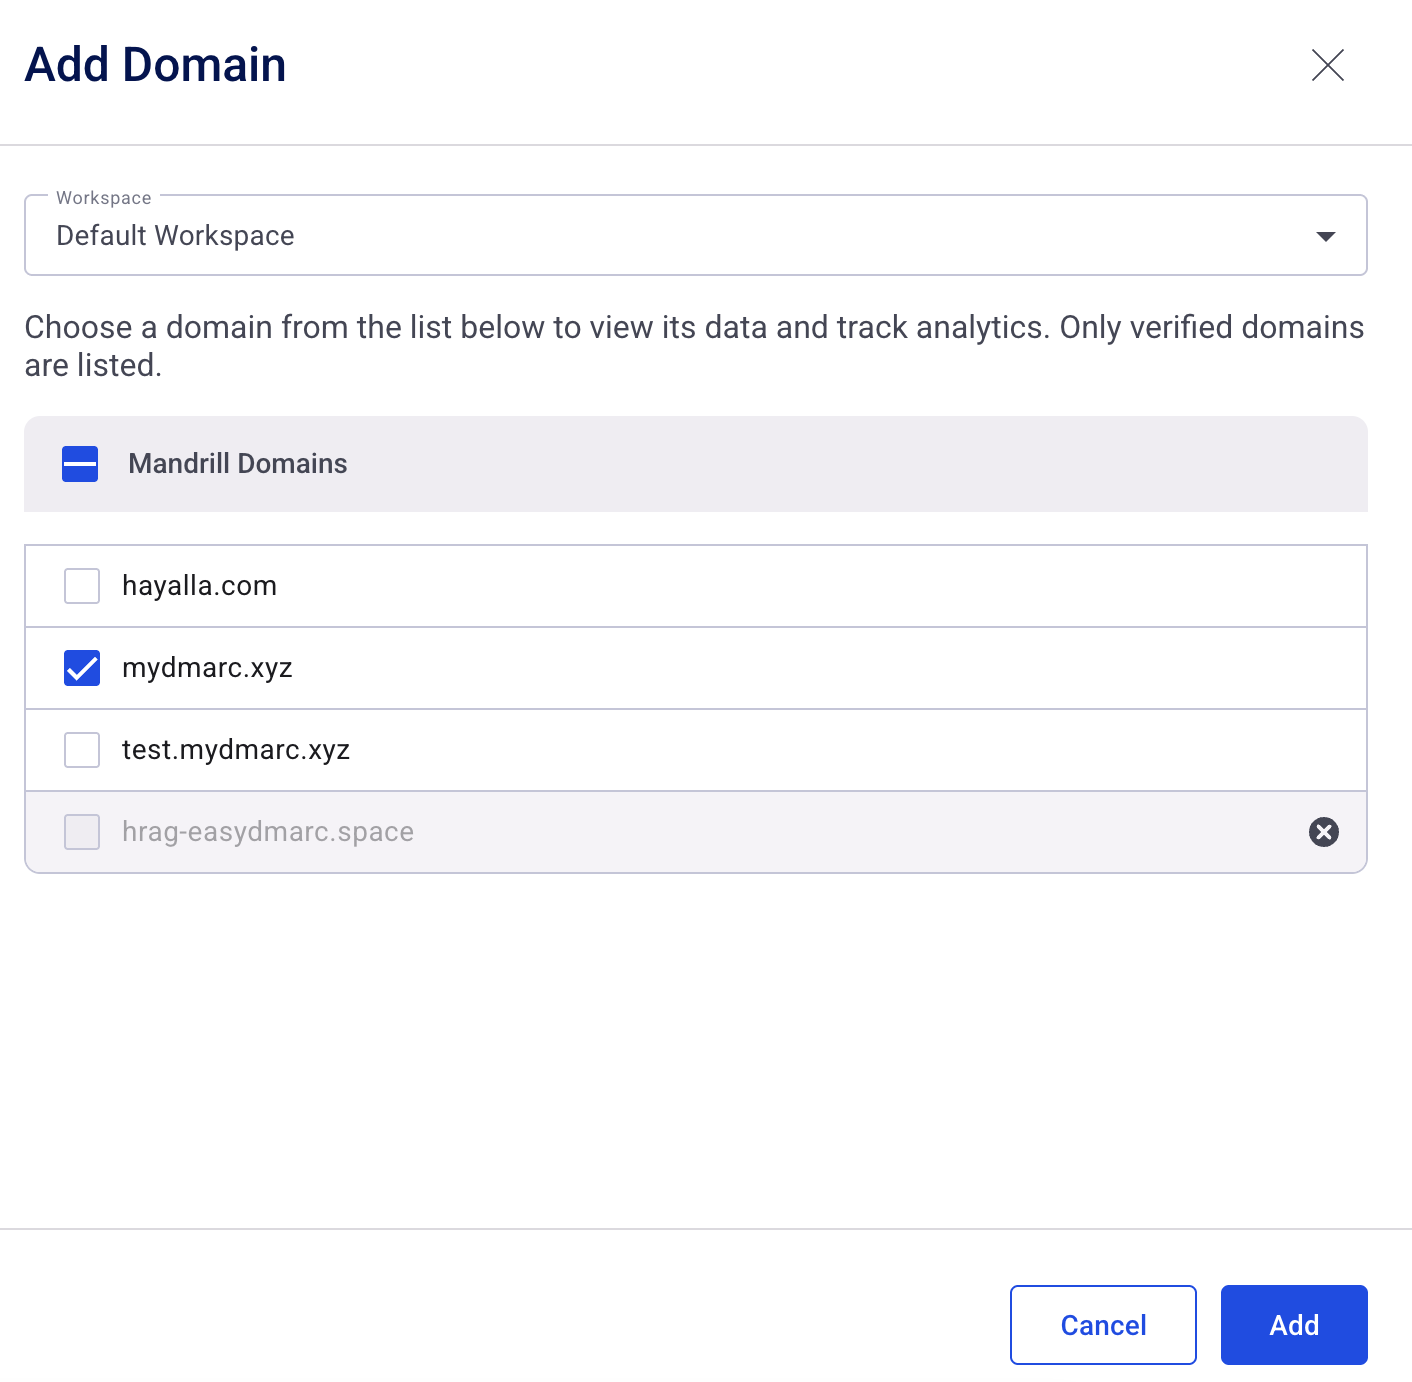
Tip: Domains shown here come directly from your Mandrill verified senders list. Only domains with a Verified status will produce reliable data. If a domain you expect is missing, verify it first in your Mandrill account under Settings → Sending Domains.
If there are still questions or concerns that remain uncovered after checking this article, you can contact EasyDMARC Technical Support.